Valentine’s Day is all about expressing love, but who says it has to be all pink and red? This year, embrace the sultry and sophisticated side of romance with dark Valentine’s Day nail designs. From gothic elegance to moody glamour, these 14 nail ideas will help you stand out in the most stylish way.
Table of Contents
- 1. Black and Burgundy Ombre
- 2. Matte Black with Heart Accents
- 3. Dark Red Glitter Gradient
- 4. Black and Gold Foil Nails
- 5. Gothic Valentine Stiletto Nails
- 6. Black Marble Effect
- 7. Spider Web Accent Nails
- 8. Crimson Roses
- 9. Black Velvet Matte
- 10. Dark Chocolate Swirls
- 11. Garnet Glitter French Tips
- 12. Deep Plum Chrome
- 13. Midnight Starry Sky
- 14. Vampy Wine Stain Nails
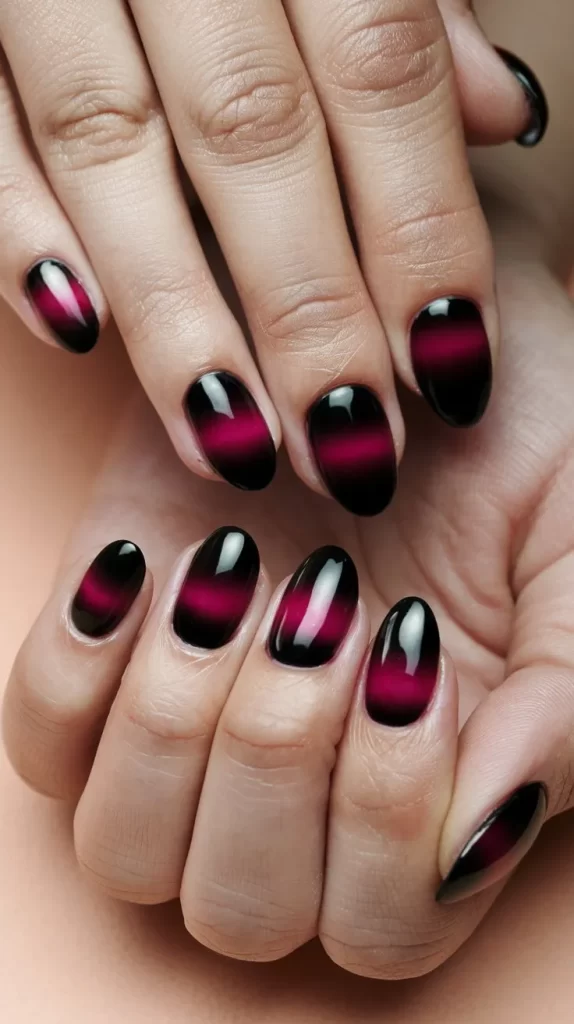
1. Black and Burgundy Ombre
This design blends deep black and rich burgundy for a dramatic and romantic gradient that screams sophistication.
Steps:
- Start with a base coat to protect your nails.
- Apply a deep black nail polish to the top half of your nails.
- Use a makeup sponge to blend burgundy polish from the middle to the tips.
- Seal with a glossy top coat for a seamless ombre effect.
Tips:
- Use liquid latex around your nails to avoid messy cleanups.
- Opt for gel polish for a longer-lasting finish.
2. Matte Black with Heart Accents
A matte black base with tiny glossy or metallic hearts creates a chic and understated Valentine’s look.

Steps:
- Apply a matte black polish as the base.
- Use a dotting tool or stencil to create small heart shapes with glossy black or metallic polish.
- Add a top coat only to the hearts for contrast.
Tips:
- Choose a fine brush for precision.
- Experiment with heart placements, like near the tips or base of the nails.
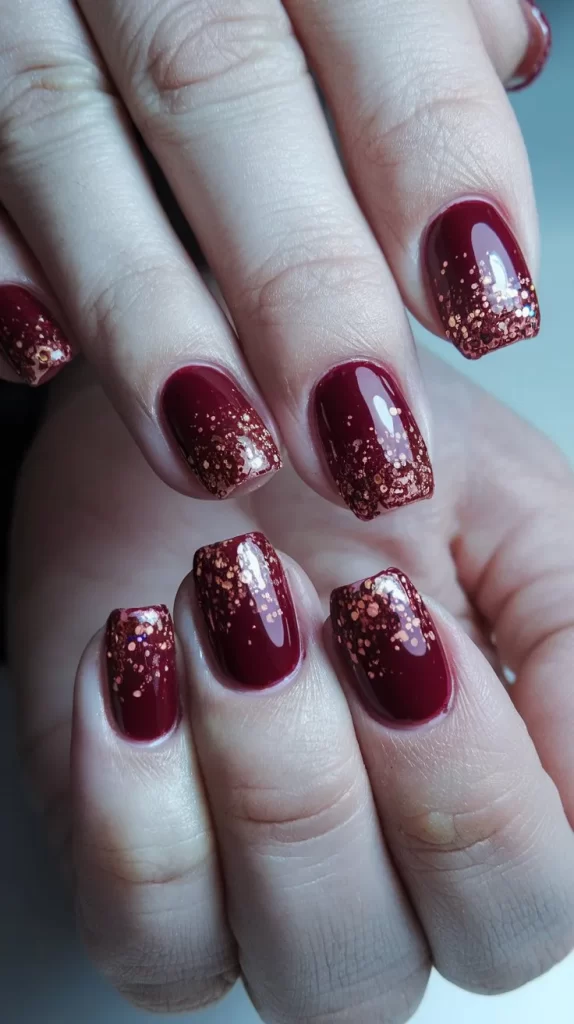
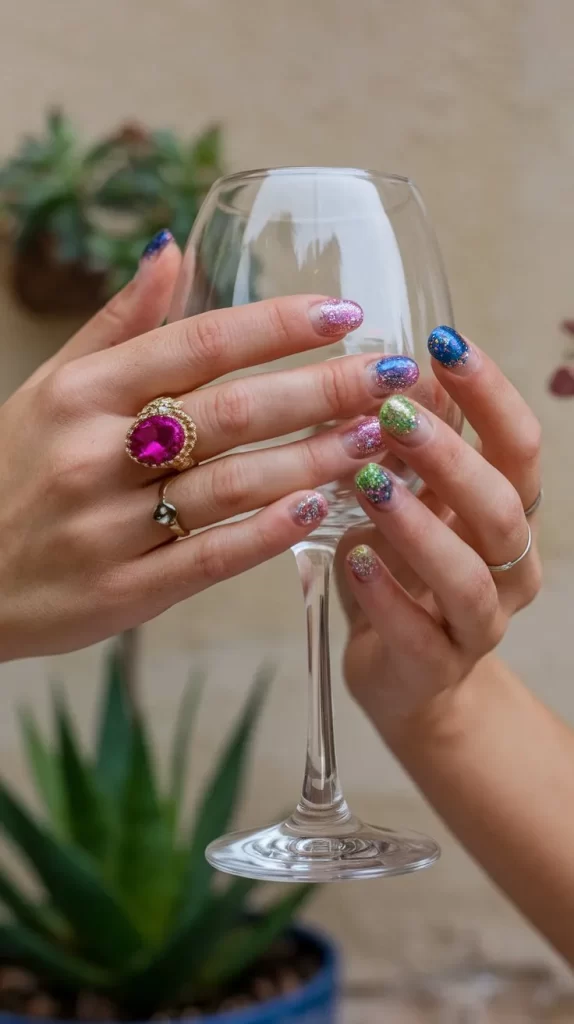
3. Dark Red Glitter Gradient
A vampy dark red base with glitter fading from the tips adds a touch of glamour.
Steps:
- Apply a deep red polish as the base.
- Dab red glitter polish onto a sponge and press it onto the nail tips.
- Gradually build up the glitter for a fading effect.
- Seal with a high-shine top coat.
Tips:
- Use chunky glitter for a bolder look.
- Pair this design with almond-shaped nails for added elegance.
4. Black and Gold Foil Nails
A striking combination of black polish and gold foil creates a luxurious design.

Steps:
- Apply a black polish as the base and let it dry completely.
- Use tweezers to place gold foil pieces randomly on the nails.
- Press the foil gently to ensure it sticks.
- Add a clear top coat to secure the design.
Tips:
- Use transfer foil glue for better adhesion.
- Keep the foil pieces irregular for a natural look.
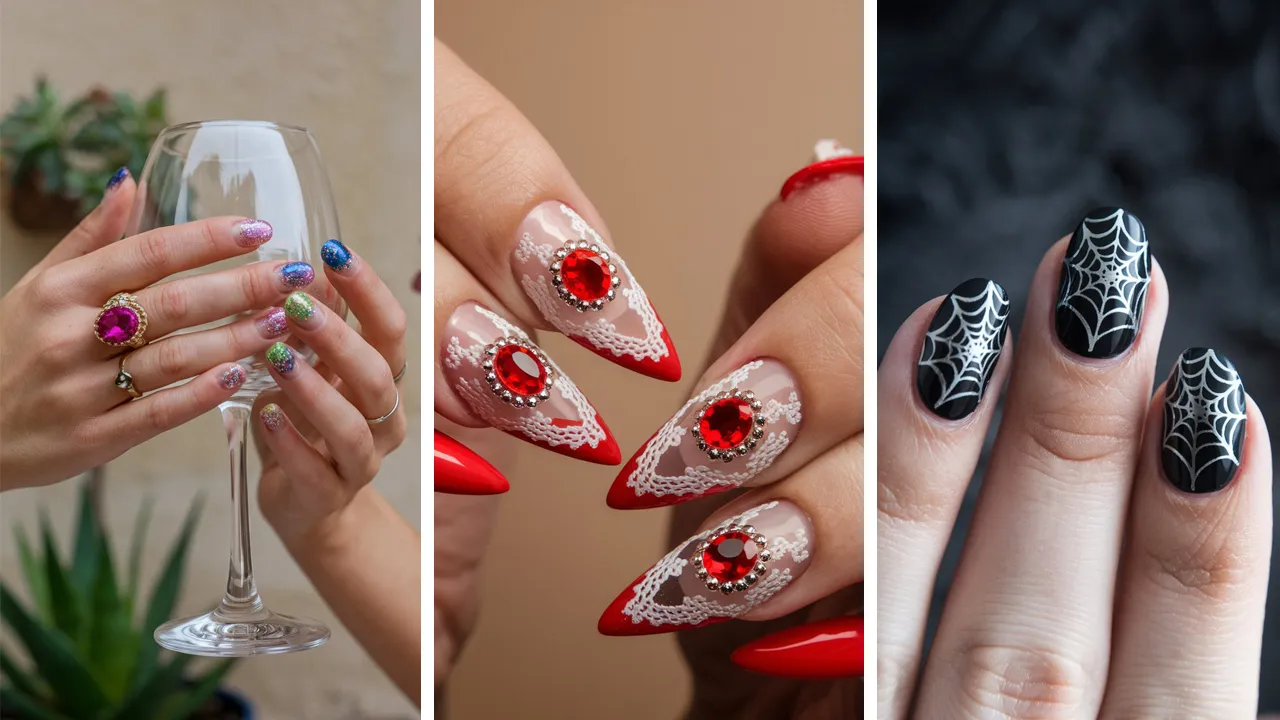
5. Gothic Valentine Stiletto Nails
Long stiletto nails with intricate lace patterns and deep red accents exude gothic romance.

Steps:
- Apply a sheer nude or light pink base coat.
- Use black nail art pens or stamping plates to create lace patterns.
- Add deep red gems or rhinestones as accents.
- Finish with a glossy top coat.
Tips:
- Practice lace designs on paper before applying.
- Use a nail stencil for uniform patterns.
6. Black Marble Effect
Black marble nails are a trendy and artistic choice for a dark Valentine’s aesthetic.

Steps:
- Paint your nails black and let them dry.
- Use a fine brush dipped in white polish to create marble-like veins.
- Blur the lines slightly with a small sponge or brush.
- Add a matte top coat for a natural marble look.
Tips:
- Look up marble patterns for inspiration.
- Use a small amount of acetone on the brush to soften the lines.
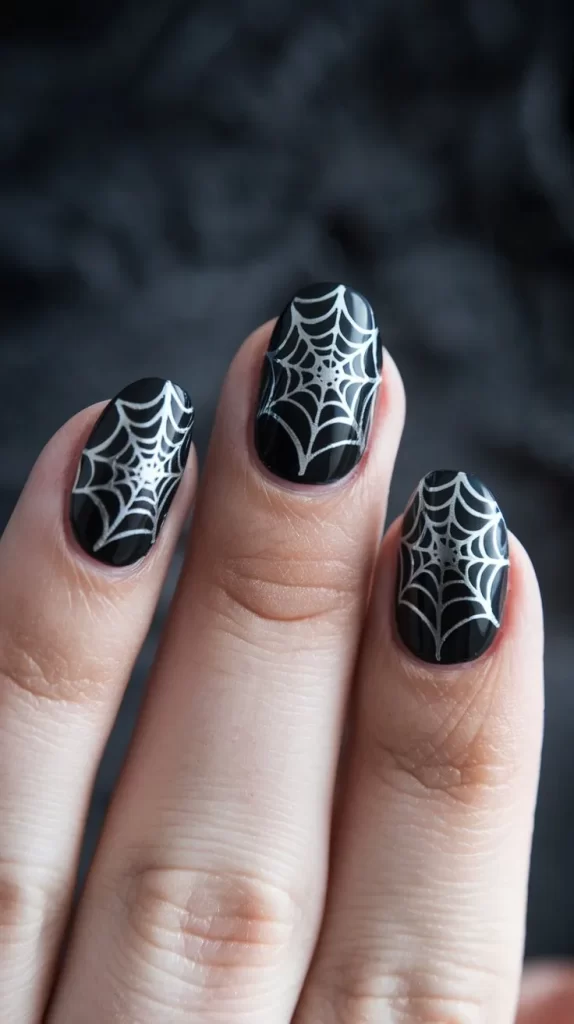
7. Spider Web Accent Nails
Add a touch of mystery with black nails featuring intricate spider web accents.
Steps:
- Apply a glossy black polish as the base.
- Use a thin brush or stamping plate to create spider web patterns on accent nails.
- Highlight with silver or glitter polish for extra flair.
- Seal with a glossy top coat.
Tips:
- Focus on one or two nails for the spider web design to avoid overcrowding.
- Practice on a plastic sheet first to perfect your web design.
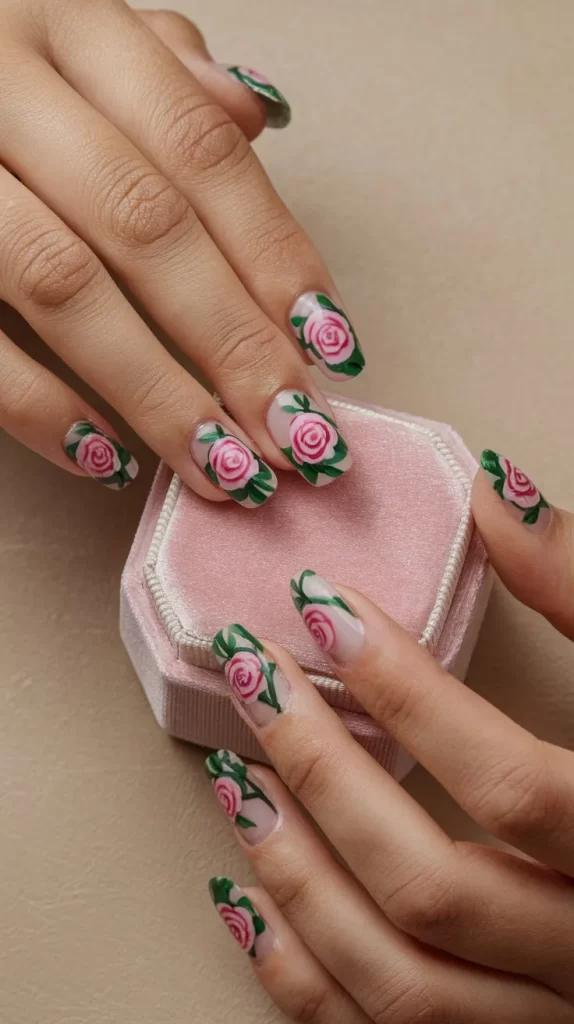
8. Crimson Roses
Channel timeless romance with dark crimson nails adorned with hand-painted roses or rose decals.
Steps:
- Apply a deep crimson polish as the base.
- Use a fine nail art brush to paint rose petals in lighter red or pink hues.
- Add subtle green leaves for depth.
- Seal the design with a glossy top coat.
Tips:
- Use a dotting tool for creating easy rose shapes if you’re not confident with freehand painting.
- Try rose nail stickers for a quicker option.
9. Black Velvet Matte
Achieve a luxurious and edgy look with matte black nails that resemble velvet.

Steps:
- Apply a matte black polish as the base.
- Add a second layer for full opacity.
- Use a velvet-textured top coat to enhance the look.
Tips:
- Ensure nails are smooth before applying matte polish to avoid uneven texture.
- Pair with statement rings for a bold style.
10. Dark Chocolate Swirls
Combine creamy browns and deep blacks to create a swirled design reminiscent of decadent dark chocolate.

Steps:
- Apply a chocolate brown polish as the base.
- Use a fine brush to add black swirls randomly across the nails.
- Blend the swirls slightly for a marbled effect.
- Finish with a glossy top coat to enhance the richness.
Tips:
- Experiment with caramel-colored swirls for added depth.
- Use nail art foil for an extra luxurious touch.
11. Garnet Glitter French Tips
Pair a nude or black base with dark garnet glitter tips for a refined, sparkly style.
Steps:
- Apply a nude or black base polish.
- Use tape or a French tip stencil to outline the tips.
- Paint the tips with garnet glitter polish.
- Seal with a clear top coat.
Tips:
- Opt for fine glitter for a more subtle look.
- Use a peel-off base coat if using heavy glitter for easier removal.
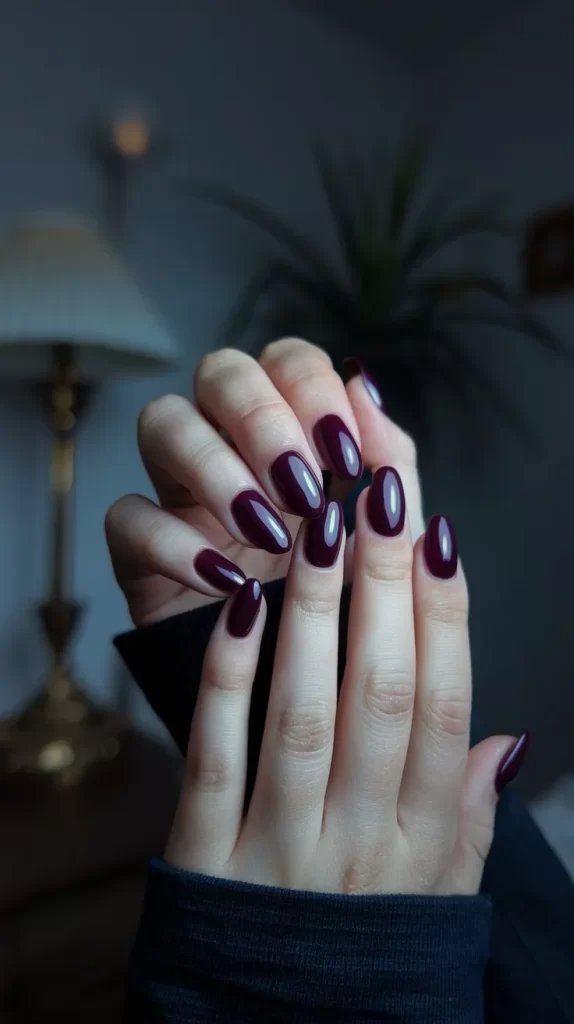
12. Deep Plum Chrome
A rich plum base with a chrome finish offers a futuristic and romantic vibe.
Steps:
- Apply a deep plum polish as the base and let it dry.
- Use a chrome powder or polish for the reflective effect.
- Buff gently and seal with a clear top coat.
Tips:
- Work quickly with chrome powders to avoid uneven application.
- Experiment with different base colors to achieve unique undertones.
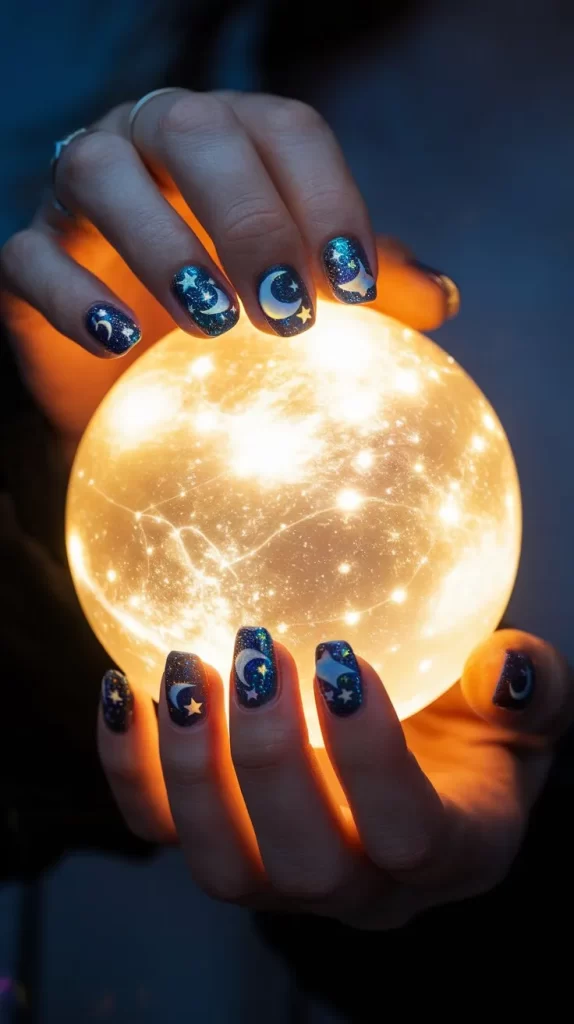
13. Midnight Starry Sky
Create a celestial vibe with a navy or black base and starry accents.
Steps:
- Paint your nails navy or black and let them dry.
- Use a fine brush or dotting tool to add tiny silver and gold stars.
- Apply holographic glitter for a shimmering effect.
- Seal the design with a glossy top coat.
Tips:
- Use a stamping plate for precise star designs.
- Layer the glitter for a galaxy-like depth.
14. Vampy Wine Stain Nails
Recreate the sultry look of red wine stains with a blend of deep reds and purples.

Steps:
- Apply a sheer nude or light pink base coat.
- Use a sponge to dab dark red and purple polish randomly.
- Blend the colors for a soft, stained effect.
- Add a clear gloss top coat to mimic the wet look of wine.
Tips:
- Use jelly polishes for a more translucent finish.
- Add a fine glitter overlay for extra sparkle.