Valentine’s Day is the perfect time to refresh your look with cute, romantic nails. If you love bold color, pink and red Valentines Day nail art inspiration can help you create a style that feels fun, sweet, and confident. The best part is you don’t need expensive salon visits to get beautiful results.
With a few simple tools and smart color choices, you can create designs that look professional while staying affordable and cost-effective. In this post, you’ll find 14 nail art ideas that work for short or long nails, beginner or advanced skills, and simple or detailed looks.
Table of Contents
- 1) Classic Pink Base with Red Heart Tips
- 2) Red French Tips with a Pink Glitter Accent Nail
- 3) Pink Ombre with Red Micro Hearts
- 4) Red and Pink Swirl Candy Nails
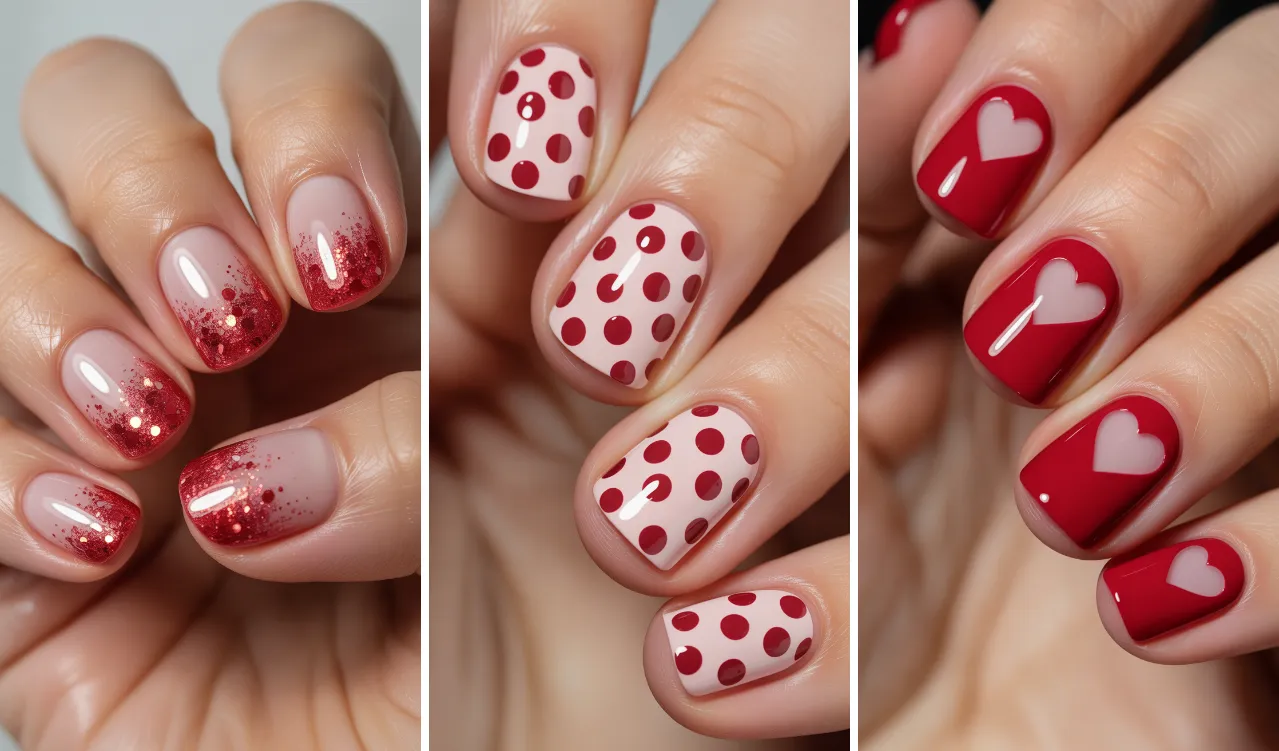
- 5) Pink Base with Red Polka Dots (Retro Valentine Style)
- 6) Red Base with Pink Negative Space Hearts
- 7) Pink Matte Nails with Red Glossy Hearts
- 8) Red Glitter Fade with a Pink Base
- 9) Pink and Red Checkerboard Accent Nails
- 10) Minimal Pink Nails with Tiny Red Cupid Arrows
- 11) Red Nails with Pink Heart Confetti
- 12) Pink Marble Nails with Red Veins
- 13) Pink Nails with Red Lace Pattern
- 14) Red and Pink Half-and-Half Nails with a Gold Line Detail
- Budget-Friendly Tips to Make Your Valentine Nails Last Longer
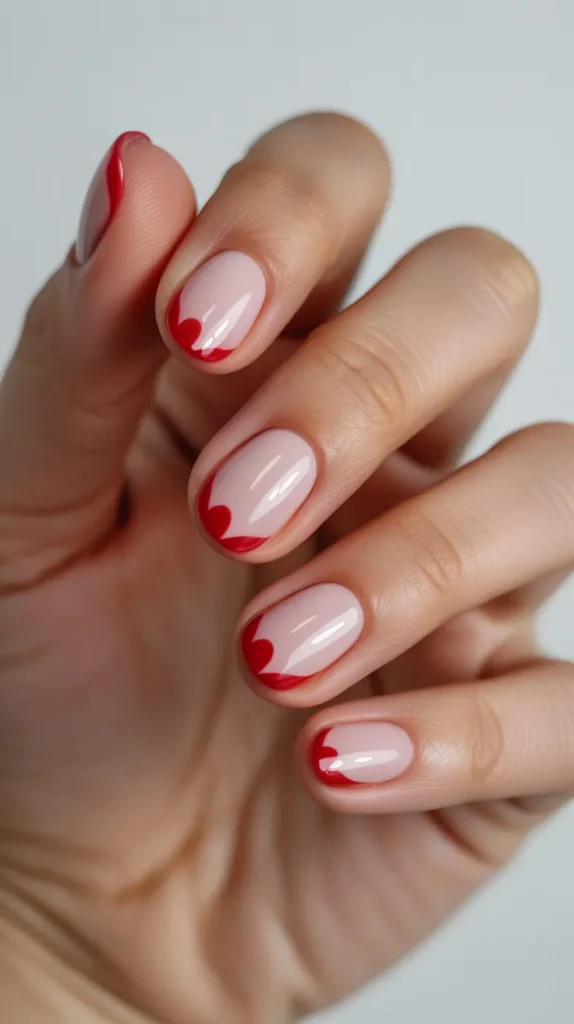
1) Classic Pink Base with Red Heart Tips
A classic pink base with red heart tips is one of the easiest ways to start your pink and red Valentines Day nail art inspiration journey. Paint your nails a soft blush pink, then add tiny red hearts near the tips. This style looks clean and romantic without being too loud. It’s also a smart choice if you want something that matches every outfit, from cozy sweaters to party dresses.
To keep it budget-friendly, use a toothpick or bobby pin to dot the hearts instead of buying special tools. A glossy top coat helps the hearts pop and makes the manicure last longer, which is a cost-effective way to reduce touch-ups. This design is also great for short nails because the hearts don’t need much space.
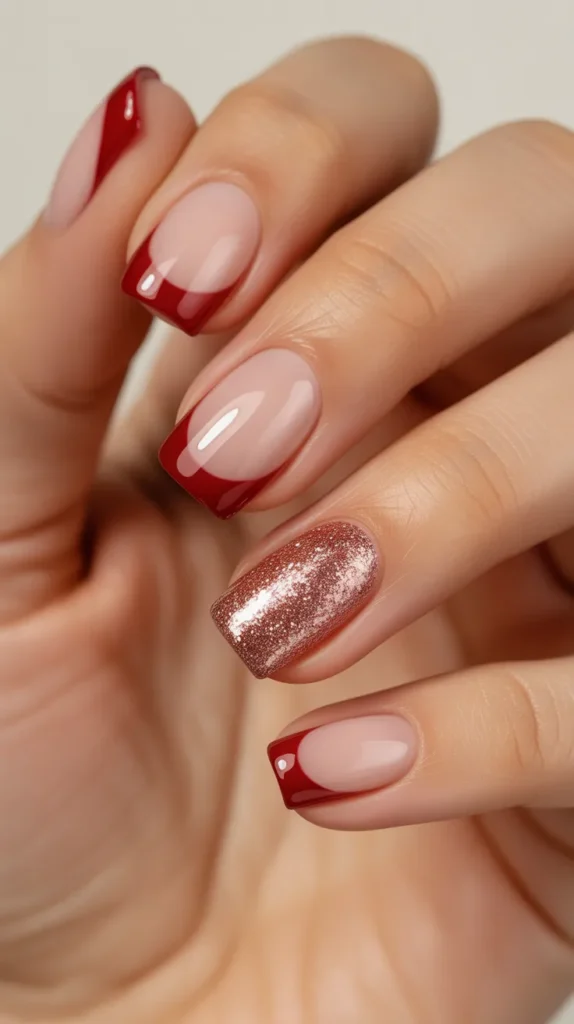
2) Red French Tips with a Pink Glitter Accent Nail
Red French tips are a bold upgrade from the traditional white tip, and they look stunning for Valentine’s season. Start with a sheer nude or light pink base, then paint crisp red tips across each nail. Add one accent nail in pink glitter to create a fun highlight without making the whole set look too busy. This is a great investment look because it feels salon-inspired but is easy to do at home.
To make it more affordable, use a small makeup sponge to dab glitter polish on the accent nail. You can also use nail tape for sharp French tip lines, which helps prevent mistakes and saves time. This design is a smart purchase idea if you want a reusable look that works for dinner dates, school events, or office days.
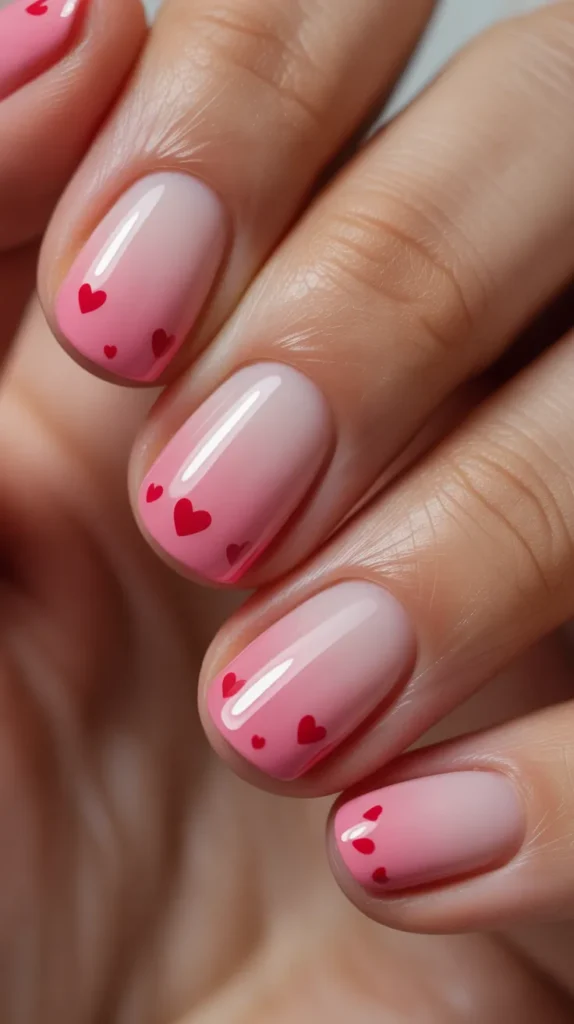
3) Pink Ombre with Red Micro Hearts
Pink ombre nails look soft and dreamy, and they pair perfectly with tiny red hearts. Blend a pale pink into a deeper rosy pink using a sponge, then add micro hearts on top. The hearts can be placed randomly or in a gentle pattern. This idea gives you a lot of style without needing advanced skills, which makes it a cost-effective way to get a trendy look.
For a more budget-friendly approach, use two pink polishes you already own and blend them slowly in thin layers. If you want the hearts to look clean, use a dotting tool or the tip of a hairpin. Finish with a top coat so the ombre stays smooth and the design lasts longer, saving money on fixes.
You can often find heart nail stickers, ombre sponges, and glitter top coats in local beauty stores or budget-friendly online marketplaces. Buying a small nail art kit can be a smart purchase if you plan to reuse the tools for multiple holiday designs.
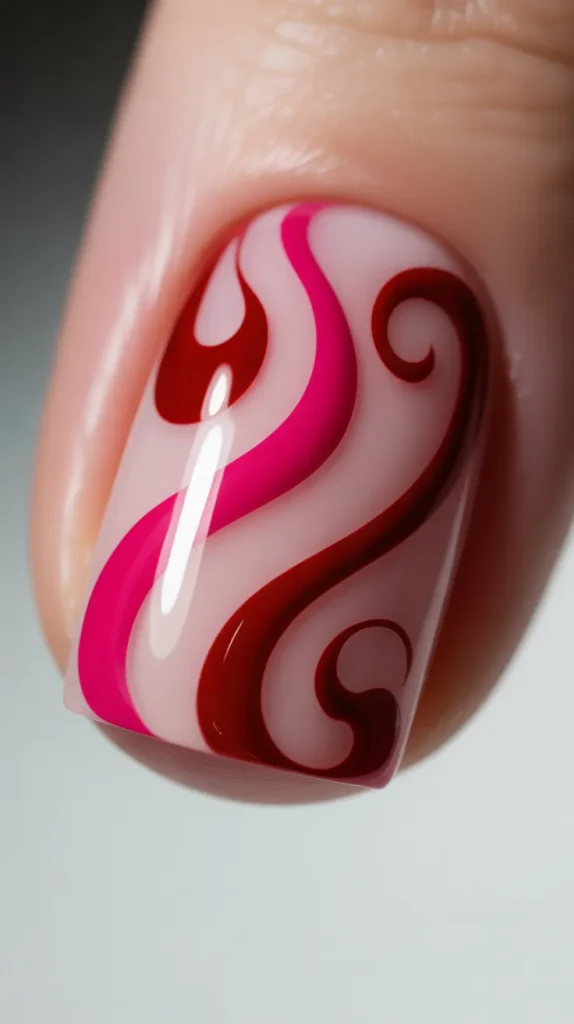
4) Red and Pink Swirl Candy Nails
Swirl nails are one of the most popular trends for Valentine’s Day, and they look like candy ribbons. Use a light pink base, then add curved red and hot pink lines that swirl across each nail. The design looks playful but still stylish, making it perfect for anyone who wants something modern. This is strong pink and red Valentines Day nail art inspiration for Pinterest because swirls photograph well.
To keep it affordable, use a thin nail art brush or even a clean eyeliner brush. If the lines aren’t perfect, don’t worry—swirls look better when they feel natural. A glossy top coat will blend everything together and make the colors look bright, which is a cost-effective way to upgrade the final look.
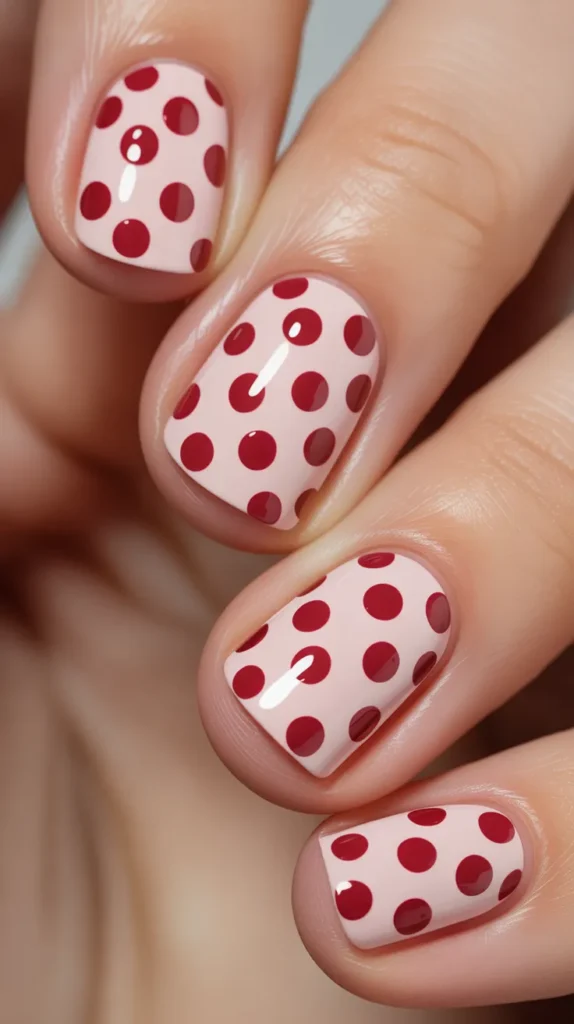
5) Pink Base with Red Polka Dots (Retro Valentine Style)
Polka dot nails are simple, cute, and beginner-friendly. Paint your nails a soft pink, then add red dots in neat rows or a scattered pattern. This retro style feels fun and youthful, and it works well on both short and long nails. If you want an easy look that still fits the holiday theme, this is one of the most budget-friendly designs you can do.
To make it more cost-effective, use the end of a bobby pin or toothpick for the dots instead of buying a dotting tool. You can also switch the pattern by making one accent nail with bigger dots. Finish with a shiny top coat to protect the dots and help the manicure last longer, saving money on quick chips.
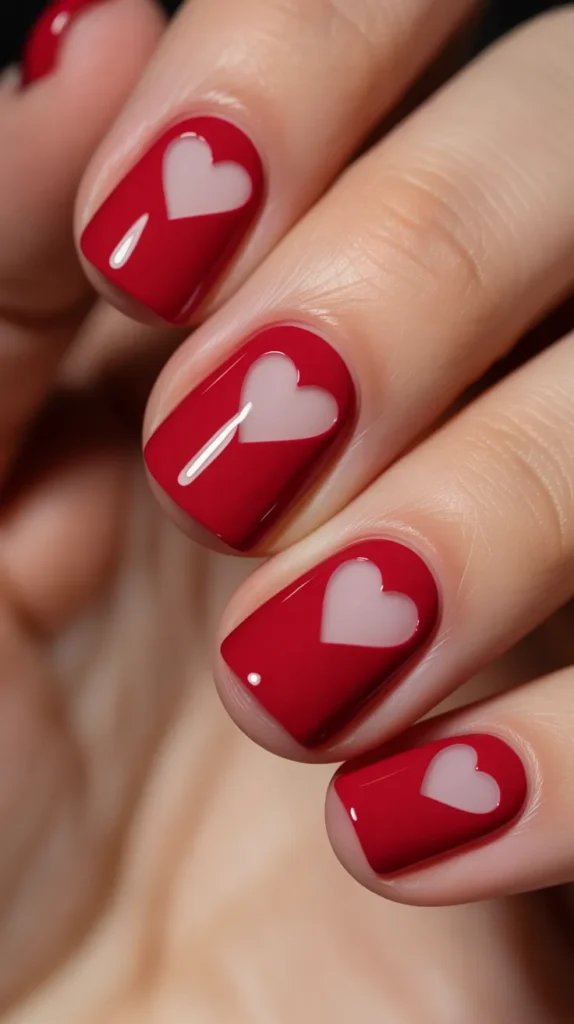
6) Red Base with Pink Negative Space Hearts
Negative space nail art looks modern and clean, and it’s a smart way to create contrast without extra clutter. Start with a red polish base, then leave small heart shapes unpainted so your natural nail shows through. You can create the heart shape using tape or a small sticker as a guide. This design feels bold, stylish, and very “Valentine’s Day” without needing glitter or gems.
For a more affordable method, use small heart stickers to block off the shape, then paint over them. When you peel the sticker, the heart space stays clear. This is a great investment look because it stands out in photos and looks like professional nail art. A top coat will keep the edges smooth and protect the design.
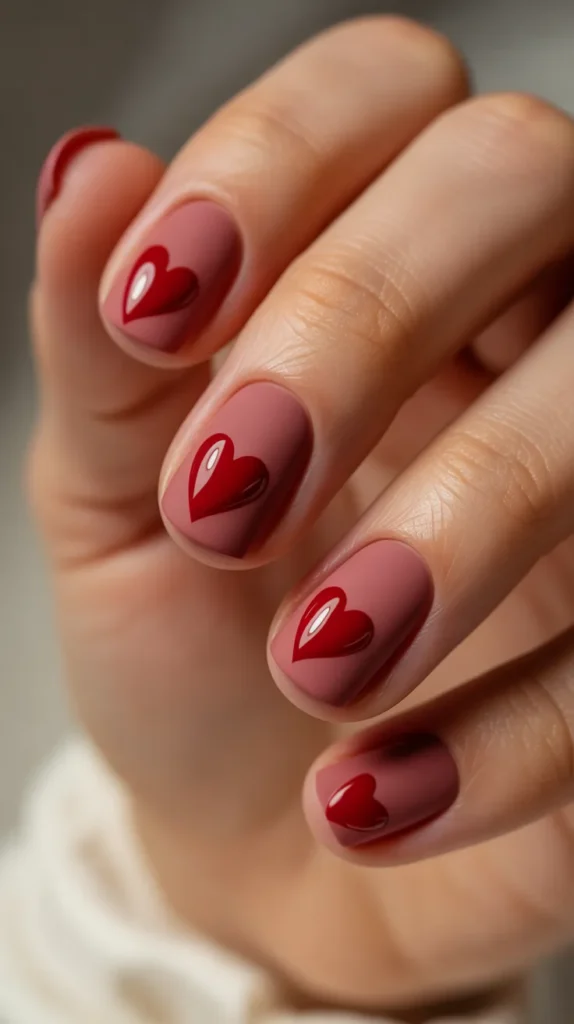
7) Pink Matte Nails with Red Glossy Hearts
Mixing matte and glossy finishes creates a rich, expensive-looking effect without extra cost. Paint your nails pink, then apply a matte top coat. After it dries, add glossy red hearts on top using a small brush or dotting tool. The shine of the hearts against the matte background looks detailed and stylish, making it great for pink and red Valentines Day nail art inspiration content.
This design is also cost-effective because you only need one matte top coat to create many looks. If you don’t have a matte top coat, you can still do the same design with a glossy finish and keep it simple. The heart details don’t have to be perfect—small hearts look cute even when handmade.
Matte top coats, heart decals, and fine nail brushes are usually easy to find in beauty aisles and local cosmetic shops. Choosing multipurpose nail tools can be a smart purchase because they work for many designs beyond Valentine’s Day.
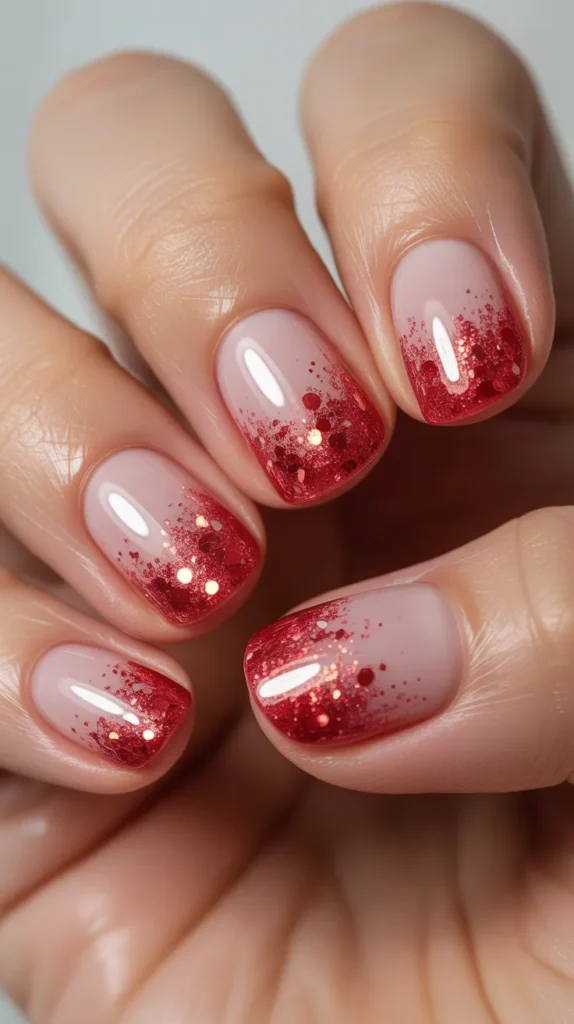
8) Red Glitter Fade with a Pink Base
A glitter fade looks glamorous but is still easy for beginners. Start with a light pink base, then dab red glitter near the tips and blend it downward for a soft fade. This design gives you sparkle without needing rhinestones, and it looks amazing under indoor lights. It’s a great choice if you want nails that feel festive but still classy.
To keep it budget-friendly, use a makeup sponge to press glitter polish onto the nail. This method uses less product and gives a smoother fade, which saves money over time. Add a thick top coat to seal the glitter so it doesn’t feel rough. This is a cost-effective way to get a long-lasting, party-ready manicure.
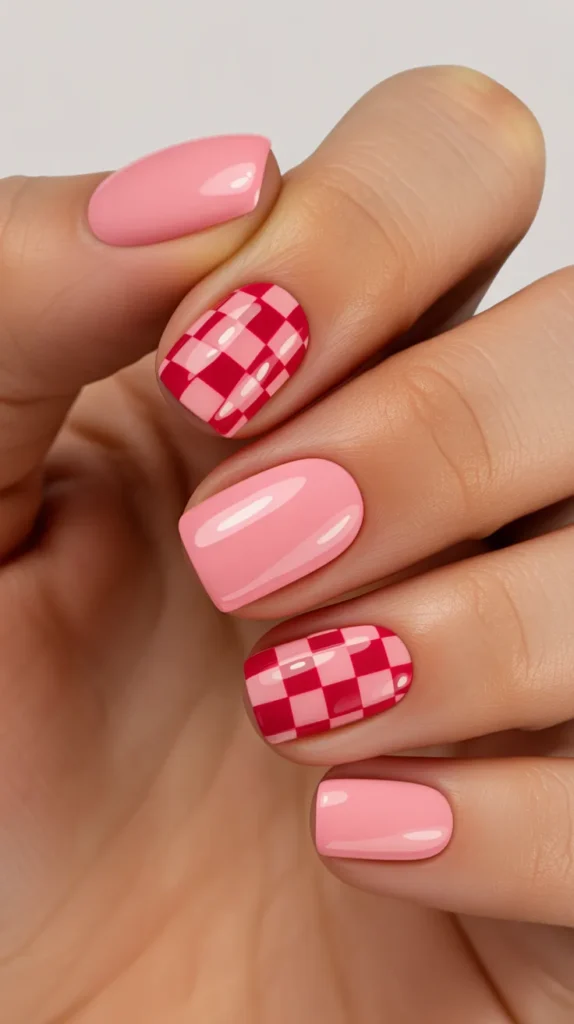
9) Pink and Red Checkerboard Accent Nails
Checkerboard nails are trendy and eye-catching, especially for Pinterest photos. Use a pink base on most nails, then create a red-and-pink checkerboard pattern on one or two accent nails. The pattern adds a playful vibe while still keeping the Valentine theme strong. This is a fun idea if you want something different from hearts.
For a more affordable approach, use nail striping tape to create straight lines. Paint the base color first, then add the second color in squares. Even if the squares are not perfect, the design still looks cool. It’s a smart purchase to invest in striping tape because it can be reused for many nail art styles.
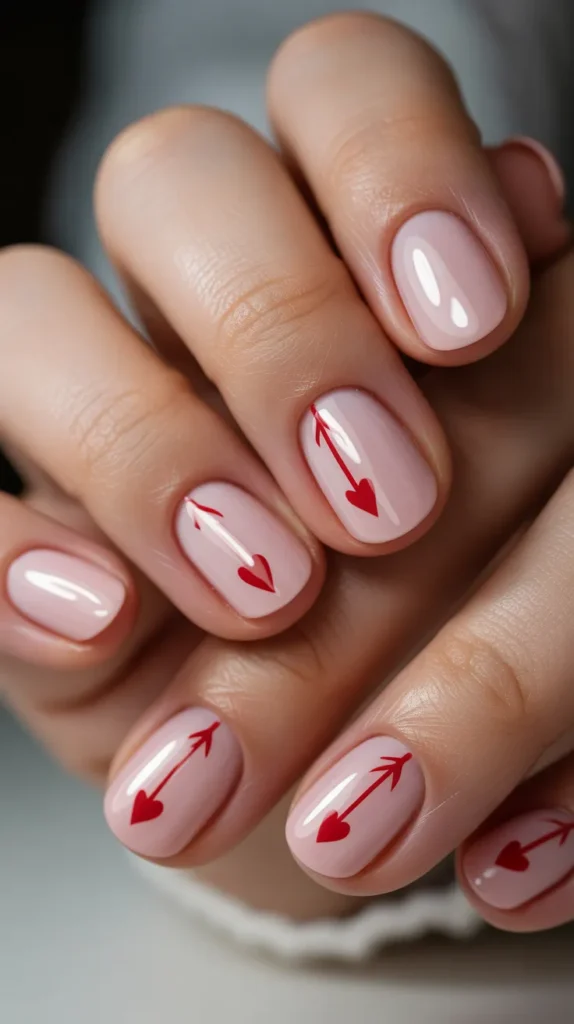
10) Minimal Pink Nails with Tiny Red Cupid Arrows
If you love simple nails, tiny cupid arrows are a sweet detail that doesn’t feel too much. Paint your nails a soft pink, then add small red arrow designs on a few nails. You can place the arrows diagonally or near the cuticle for a clean look. This idea is cute, modern, and perfect for everyday wear.
To make it cost-effective, draw the arrows using a thin brush or even a toothpick for the arrowhead. Keep the design small so mistakes are easy to fix. This manicure is also a smart option if you want a design that looks neat for school or work while still matching the Valentine theme.
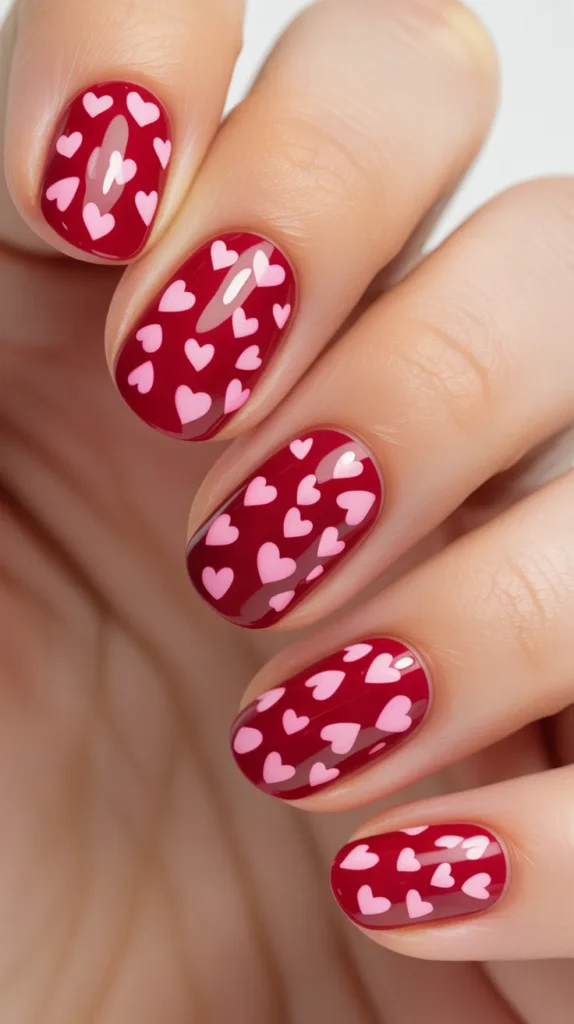
11) Red Nails with Pink Heart Confetti
Heart confetti nails look fun and cheerful, like a Valentine party on your fingertips. Paint your nails red, then add small pink heart shapes scattered across the nails. You can do this with heart stickers, glitter hearts, or hand-painted hearts. The contrast between red and pink makes the design pop in photos, which is great for Pinterest clicks.
For a more budget-friendly option, place heart shapes only on two accent nails and keep the rest solid red. This saves time and materials while still looking complete. A glossy top coat will lock everything in place and make it last longer, which is a cost-effective way to avoid quick peeling.
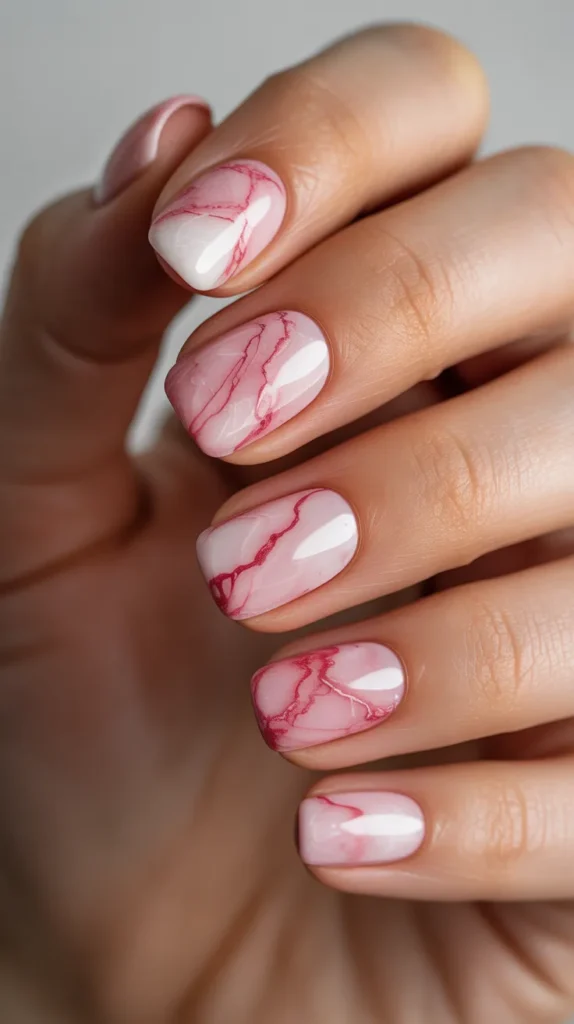
12) Pink Marble Nails with Red Veins
Marble nails look fancy and expensive, but you can create a simple version at home. Start with a light pink base, then add soft white swirls and thin red lines to mimic marble veins. This style feels elegant and romantic, making it a strong pink and red Valentines Day nail art inspiration option for a dressy event.
To keep it affordable, use the plastic wrap method. Dab white and red polish lightly, then press plastic wrap on the nail to create natural marble texture. Each nail will look unique, which makes the design even more interesting. Seal it with a glossy top coat for a smooth finish that looks like a salon manicure.
Soft availability note: Marble nail tools like thin brushes, sponges, and simple top coats are often available in affordable starter kits at local stores. Picking a basic kit can be a smart purchase if you want to try multiple nail art styles without spending too much.
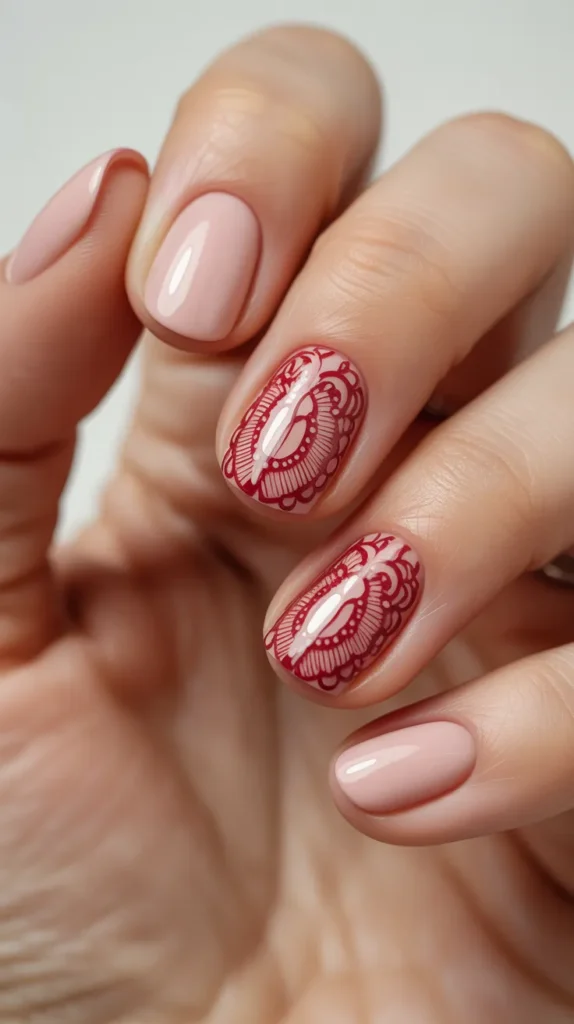
13) Pink Nails with Red Lace Pattern
A red lace pattern over pink nails gives a romantic, vintage feel. Start with a soft pink base, then create lace-like details using thin red lines, tiny curves, and small dots. You can do lace on just one accent nail if you want a simpler look. This style feels delicate and special, perfect for Valentine’s Day photos.
For a more cost-effective option, use lace nail stickers or stamping plates if you already have them. If you’re drawing it by hand, keep the lace pattern simple and repeat the same shapes. A glossy top coat will help smooth out the design and protect the fine details, making your manicure last longer.
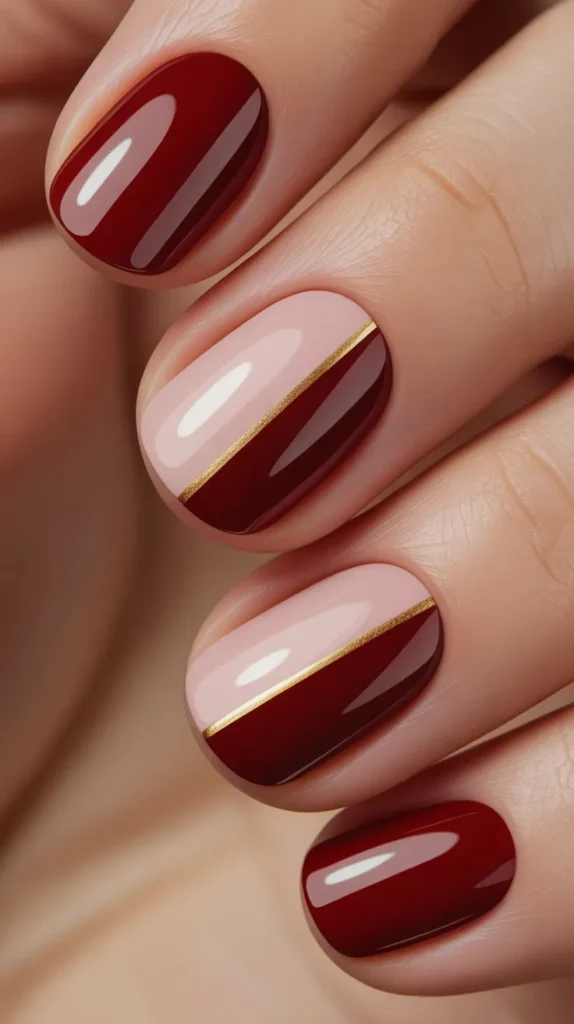
14) Red and Pink Half-and-Half Nails with a Gold Line Detail
Half-and-half nails are bold, modern, and easy to customize. Split each nail into two halves—one red and one pink—either vertically or diagonally. Then add a thin gold line where the colors meet for a clean, polished look. This design feels like a high-end manicure, but it can still be budget-friendly when done at home.
To save money, use a thin striping brush or nail tape for the gold line. If you don’t have gold polish, you can skip it and still keep the design stylish. This manicure is a smart choice if you want something that looks like a strong investment in your style, without paying salon prices.
Budget-Friendly Tips to Make Your Valentine Nails Last Longer
If you want your pink and red Valentines Day nail art inspiration to stay fresh, focus on small steps that save money over time. Always apply a base coat to prevent staining, and use a quality top coat to reduce chips. Doing thin layers instead of thick coats helps polish dry faster and last longer. Also, try accent nails instead of detailed art on every nail. It’s a cost-effective way to get a stylish look while using less product. With a little planning, you can create a cute Valentine manicure that feels like a smart purchase for your time and budget.