The holiday season is here, and you don’t need to overcomplicate your manicure to feel festive. A few simple touches can turn your nails into a merry statement without hours in the salon. In this post, you’ll find 15 fresh, easy Christmas nail ideas (different from the common ones) to brighten your hands this season.
Table of Contents
- 1. Pastel Candy Cane Swirls
- 2. Evergreen Pine Branch Accent
- 3. Matte Burgundy with Glossy Stripe
- 4. Frosted Pine Cone Silhouette
- 5. Metallic Olive Green Accents
- 6. Snowy Pine Needles
- 7. Candy Mint Polka Spots
- 8. Candy Wrapper Foil Strips
- 9. Icy Blue Frost Tips
- 10. Holly Leaf Silhouette
- 11. Red Berry Cluster Accent
- 12. Twinkling Star Outlines
- 13. Subtle Candy Stripe Side Accent
- 14. Berry Red Matte Accent
- 15. Snowy Branch Shadows
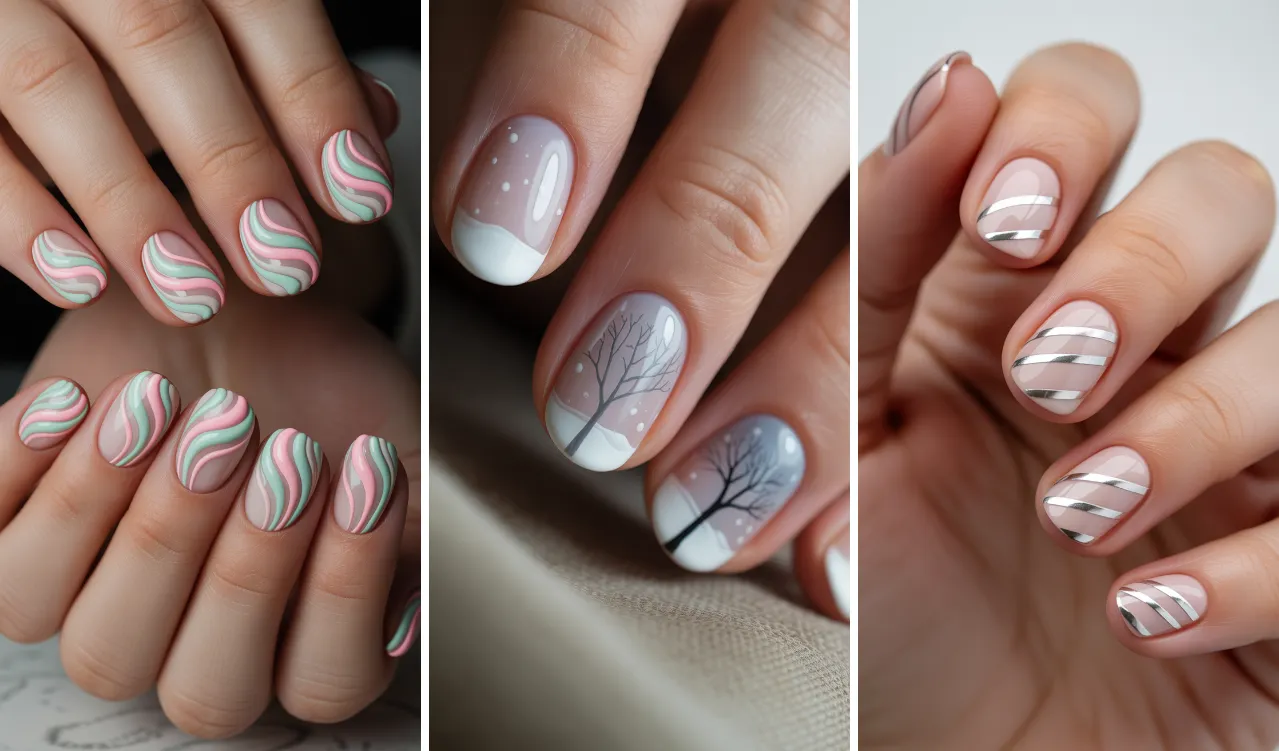
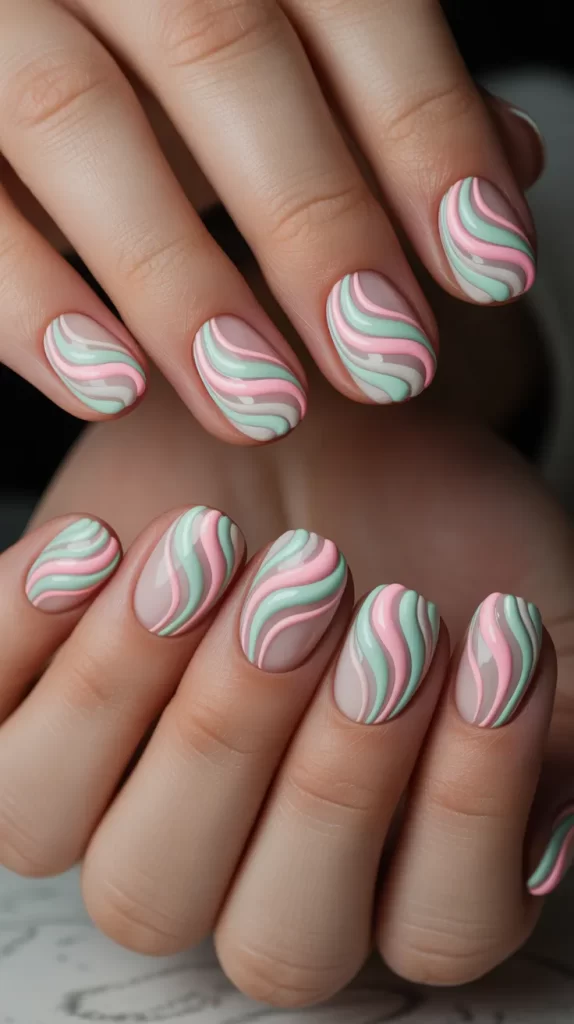
1. Pastel Candy Cane Swirls
Instead of using bold red and white, try a soft pastel version of the candy cane swirl. Use pale pink, mint green, and ivory on a light nude base. With a thin brush, draw very subtle curved stripes that twist around one another on each nail. The pastel palette keeps it gentle and clean, while the swirl motif still gives that holiday candy cane feel.
You can choose to do the swirl on just one accent nail or repeat it on all nails for a coordinated look. For nails without the swirl, keep them in plain pastel shades or sheer nude. The soft tones make this design work for everyday wear, not just holiday parties. Finish with a glossy topcoat to keep the swirls crisp and shiny.
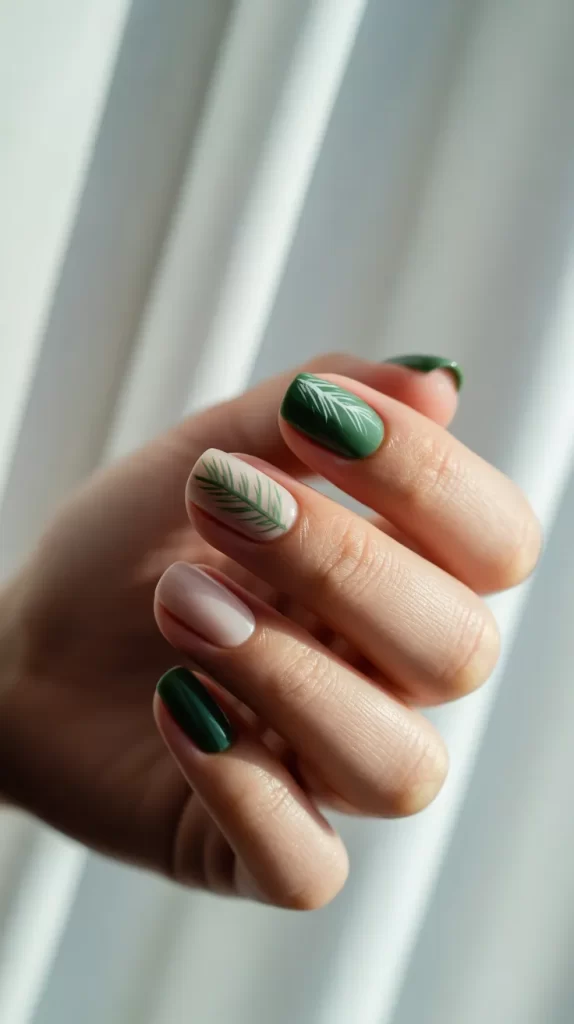
2. Evergreen Pine Branch Accent
Use a deep forest green base on one or two nails, and on those nails, paint small, thin pine-branch silhouettes in a lighter green or silver. The design evokes evergreen trees and adds a botanical Christmas touch. Keep the branches simple—just a few lines fanning out from a central stem. On the other nail, use a sheer nude or very pale beige so the green stands out.
If you like, add a tiny dot of gold or silver at the tip of one branch to mimic a star or ornament. Keep things balanced by limiting this design to accent nails. The contrast between the bold green and the neutral nails gives a classy but festive result. Seal everything with a gloss topcoat to protect the fine lines and give shine.
3. Matte Burgundy with Glossy Stripe
Pick a rich burgundy matte polish as the base for all nails. After the matte polish dries, add a single vertical glossy stripe down the centre of each nail using a glossy burgundy or slightly darker shade. The contrast between matte and gloss gives visual interest while staying easy and elegant. This is subtle yet festive thanks to the holiday-appropriate burgundy colour.
You can vary the position or thickness of the stripe from nail to nail, or keep it consistent—your choice. No extra decorations or glitter are needed. The matte finish keeps it soft, and the gloss line catches light in a refined way. Finish with a matte topcoat on the burgundy parts and a gloss topcoat where the stripe is, so the difference stays crisp.

4. Frosted Pine Cone Silhouette
Choose a sheer pale base—like light taupe or soft grey. On one or two “accent” nails, paint a delicate pine cone shape in a frosty colour like silver or pale white. Keep the pine cone outline minimal: just the outline and a few inner lines for texture. The rest of the nails stay solid in the pale base colour to keep the look balanced.
If you want extra flair, you can dust a fine shimmer or frost over the pine cone to mimic frost on branches. But don’t overdo it—let the silhouette remain the focal point. This design reads elegant and subtle, rather than bold. A clear glossy topcoat keeps the lines crisp and protects against chipping.
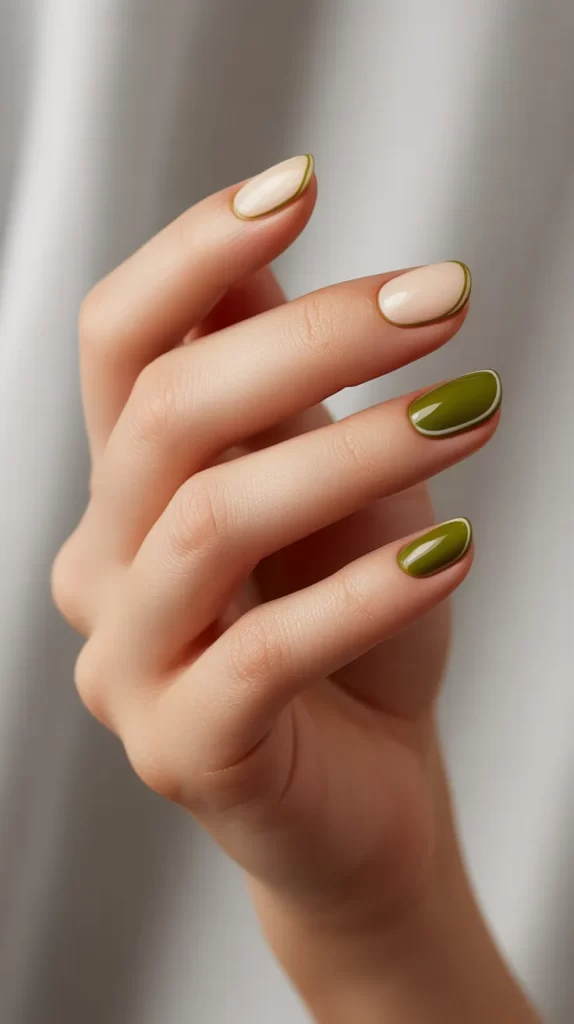
5. Metallic Olive Green Accents
For a unique twist, paint all nails a neutral cream or light beige. Then select one or two accent nails and coat them in a metallic olive green polish. The olive green gives a warm, earthy holiday tone, and the metallic finish adds sparkle. Because only a few nails carry the color, it stays wearable.
To tie everything together, you can add a slim metallic border at the base or tip of the neutral nails in the same olive green. Keep it simple—a thin line only. The metallic accents will reflect light subtly. Finish with a glossy topcoat over everything to enhance shine and unify the design.
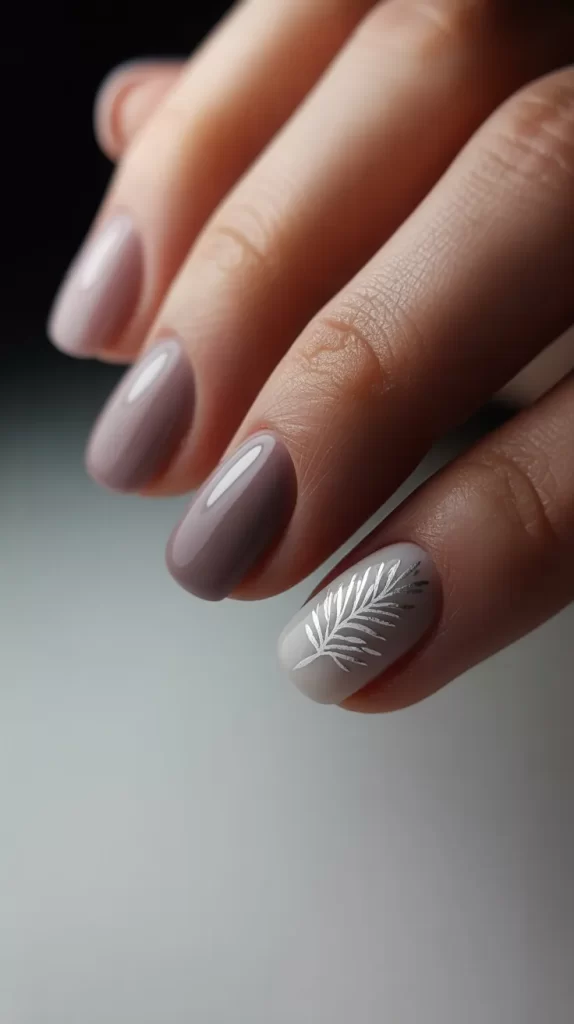
6. Snowy Pine Needles
Paint nails in a soft sage or light green color. On accent nails, add tiny white “needle” lines clustered in a pine-needle shape—short, fine strokes radiating from a center line. This gives a feel of evergreen branches dusted with snow. Keep the rest of the nails plain sage green for cohesion.
If desired, place a single tiny dot of silver or white at the tip of one cluster to act as a frosted drop or snow accent. The design stays delicate and wintry without going over the top. A glossy topcoat will make the white strokes crisp and prevent smudging.

7. Candy Mint Polka Spots
Begin with a pastel mint or seafoam base color on all nails. On top, paint small, irregular polka dots in soft pink, white, and silver. The dots should be spaced out and vary in size. This look evokes the playful candy motif but in a chilled, minty palette. It’s fun, light, and cheerful.
You can concentrate more dots on accent nails and fewer on others for balance. Don’t try to fill the nail completely—leave some space to keep it airy. The mix of colors adds dimension without being overwhelming. Use a gloss topcoat to smooth the dots and unify the surfaces.

8. Candy Wrapper Foil Strips
Use a neutral nude or pale blush base. Then, apply thin strips of metallic foil (silver, gold, or holo) in diagonal or vertical orientations on all nails or just accents. The foil looks like candy wrapping or shiny ribbon on gifts. Because you’re using simple foil strips, it’s easy yet festive.
You can layer two foil strips in different colors or cross them for a subtle “wrapped gift” motif. Keep the strips narrow and spaced so your base shows through. Finish with a glossy topcoat to seal down the foil edges and give shine. The reflective foil accents will catch light beautifully.

9. Icy Blue Frost Tips
Paint all nails a sheer or pale pink base. On the tips, apply a gradient or soft fade of icy blue or pale silver, like a frosty tip. Rather than a sharp boundary, make it fade so it looks like frost creeping down the nail. This gives a wintery, elegant effect.
You can make some nails full icy blue or keep the fade consistent on all. Optionally, add a tiny shimmer or glitter dust near the tips to mimic ice crystals. Balance is key—keep the base simple so the fade stands out. Finish with a glossy topcoat to smooth transitions and add shine.

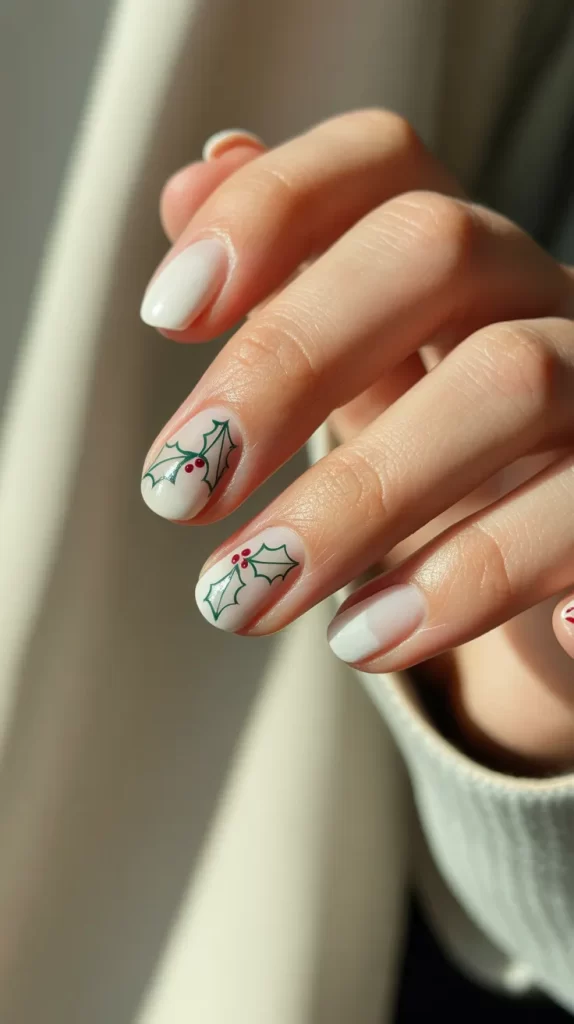
10. Holly Leaf Silhouette
Use a creamy off-white or pale beige base. On one or two accent nails, paint a simple holly leaf outline in deep green with two small red dots for berries. Keep the silhouette minimal—just the leaf edges and the berries. The rest of the nails remain in the base color to keep the design calm.
If you like, you can mirror the design on adjacent nails (leaf one way, leaf another). Or keep just a single accent for subtlety. The contrast between the soft base and the deep green leaf gives a classy holiday pop. Seal with a glossy topcoat to preserve the lines and add shine.
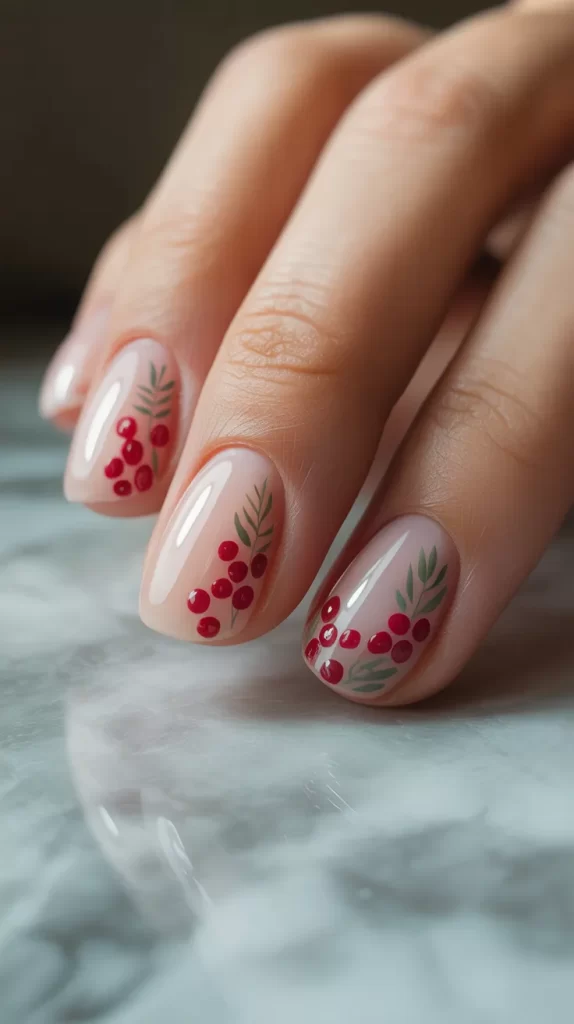
11. Red Berry Cluster Accent
Choose a light nude or soft beige base. On one or two accent nails, paint small clusters of bright red dots to represent berries. Arrange them in a loose triangle or cluster near a corner or toward the cuticle. Use a tiny dotting tool or fine brush to control size. The red pops pleasantly against the neutral base.
To support the theme, you can add a few tiny olive-green strokes nearby for leaves, though keep them minimal so the berries stay the focal point. The rest of the nails stay nude. A glossy topcoat will make the berries look juicy and vibrant. The simplicity makes this design wearable yet festive.
12. Twinkling Star Outlines
Pick a pale blue or light gray base color. On accent nails, draw tiny star outlines in white or silver—just simple five-point stars, small and spaced. You could place one star per nail or multiple small ones. Keep the design airy and let the base show through. The stars bring holiday sparkle without being busy.
You could optionally dot a tiny gemstone in the center of one star if you like a little sparkle. Keep that to one accent so it doesn’t overwhelm. The clean contrast between the soft base and white or silver star outlines looks elegant. Finish with a glossy topcoat to make the lines crisp and seal the design.

13. Subtle Candy Stripe Side Accent
Start with a nude or pale blush base. On just the side edge (the vertical edge) of one or two nails, paint a tiny candy stripe pattern using red and white or red and soft pink. It’s like a fine border rather than covering the whole nail. The effect is subtle but still festive.
You can alternate which side (left or right) of each accent nail has the stripe. Keep the stripe narrow and consistent. The rest of the nail remains plain. Seal with a topcoat to flatten and protect the edges. This side-stripe twist keeps things elegant and easy to wear daily.

14. Berry Red Matte Accent
Choose a soft neutral like light beige or taupe for most nails. On one accent nail, apply a rich berry red matte polish. Because the red nail is matte and flat, it draws the eye without needing extra decoration. The contrast between matte red and neutral glossy nails gives a modern holiday twist.
To tie in more, you could add a thin, exactly matching accent line in berry red (gloss or matte) at the base of one neutral nail. But that’s optional—many will love the single bold matte accent alone. Use a matte topcoat on the red and a gloss topcoat on the neutrals so textures differ. The result is striking yet simple.

15. Snowy Branch Shadows
Use a sheer or milky white base on all nails. On one or two accent nails, paint faint gray silhouettes of bare winter branches—thin, delicate lines fanning upward. The pale branches appear as shadows against the soft white background, giving a wintry, quiet mood. The rest of the nails stay in the base color.
If desired, place a tiny white dot or shimmer near the branch tips to hint at snowflakes. Keep that very minimal. The subtle, monochromatic style makes it appropriate for winter without being overtly Christmassy. Finish with a gloss topcoat to sharpen the branch lines and protect the design.
