
Coffin nails, also known as ballerina nails, are the ultimate shape for creating bold, statement-worthy designs. With Valentine’s Day around the corner, it’s time to deck your nails in romantic, eye-catching styles. Below, we’ve curated 14 fabulous coffin nail designs that are perfect for Valentine’s Day.
Table of Contents
- 1. Classic Red Coffin Nails
- 2. Matte Black with Red Hearts
- 3. Nude Coffin Nails with Gold Foil
- 4. Red Glitter Ombré Coffin Nails
- 5. Pink Marble Coffin Nails
- 6. Glittery Accent Nail
- 7. Red and White Stripes
- 8. Chrome Coffin Nails
- 9. Heart Cutouts
- 10. Red Roses on Nude Base
- 11. Glittered Heart Tips
- 12. Velvet Matte Red Nails
- 13. Love Letter Design
1. Classic Red Coffin Nails
Bold and timeless, glossy red coffin nails are a must-have for Valentine’s Day.

Steps:
- Shape your nails into coffin tips and apply acrylics if needed.
- Apply a clear base coat to protect your nails.
- Paint two coats of glossy red polish.
- Seal with a high-shine top coat.
Tip: Opt for a quick-drying polish to avoid smudging.
2. Matte Black with Red Hearts
For a sultry and edgy Valentine’s look, pair matte black with red heart accents.

Steps:
- Apply a matte black polish to your coffin nails.
- Use a fine brush to draw red hearts on each nail.
- Finish with a matte top coat.
Tip: Practice heart shapes on a palette before applying them to your nails.
3. Nude Coffin Nails with Gold Foil
Add a touch of luxury to a minimalist nude base with gold foil accents.
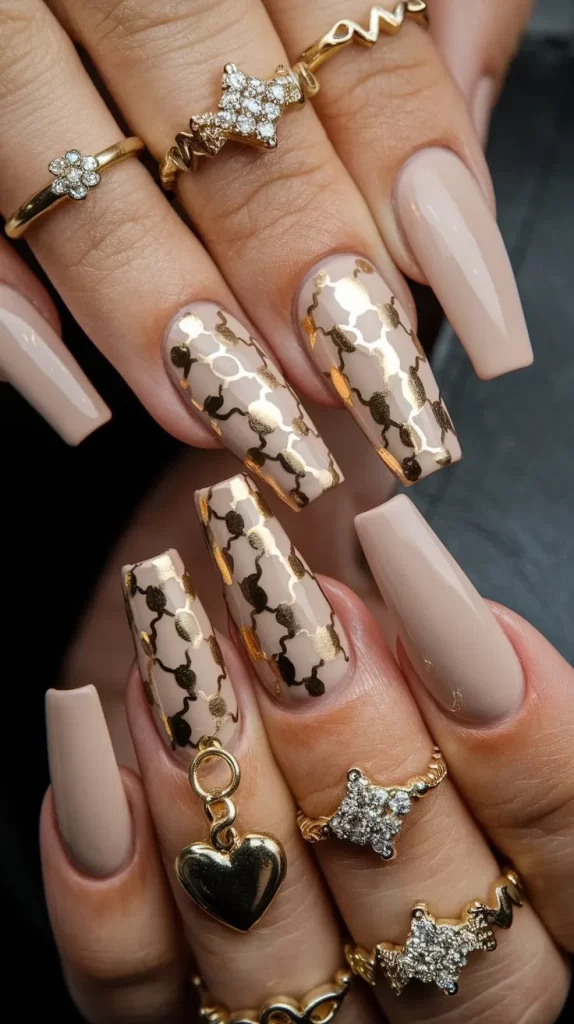
Steps:
- Paint your nails with a nude polish.
- Apply gold foil randomly to each nail while the polish is still tacky.
- Seal with a glossy top coat.
Tip: Use tweezers for precise application of the gold foil.
4. Red Glitter Ombré Coffin Nails
A glittery red ombré design offers a dazzling Valentine’s look.

Steps:
- Apply a clear base coat.
- Use a sponge to blend red glitter polish from the tips downward for an ombré effect.
- Repeat until you achieve the desired opacity.
- Seal with a top coat.
Tip: Use a latex barrier around your nails for easier clean-up.
5. Pink Marble Coffin Nails
Create a soft and sophisticated marble effect using shades of pink and white.

Steps:
- Paint your nails with a pale pink base coat.
- Use a fine brush to swirl white and darker pink polishes into marble patterns.
- Add subtle gold or silver veins for extra detail.
- Finish with a glossy top coat.
Tip: Work quickly while the polish is wet to achieve seamless swirls.
6. Glittery Accent Nail
Highlight one or two nails with glitter for a chic yet understated design.
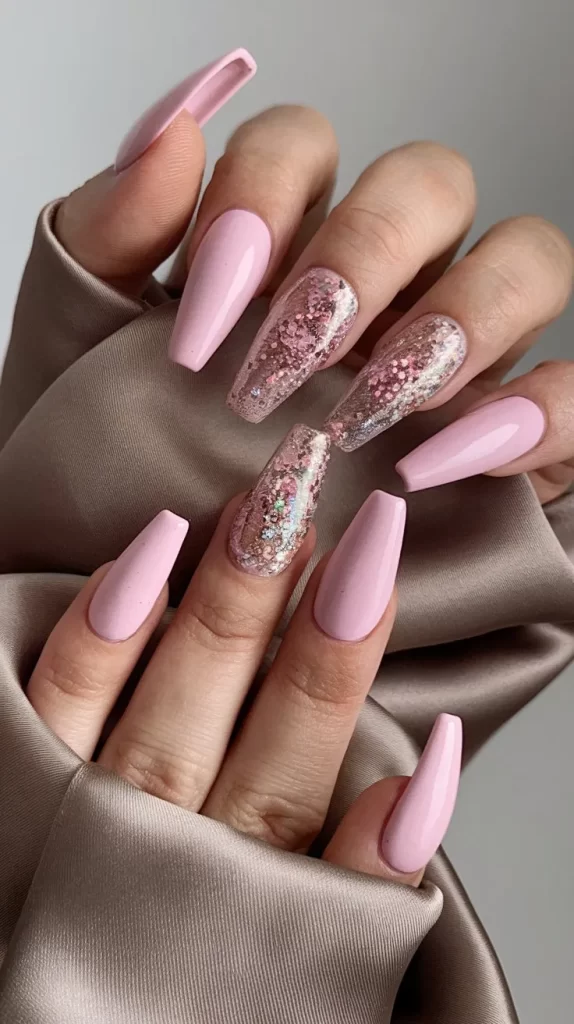
Steps:
- Paint most nails with a solid red or pink polish.
- Choose one nail on each hand to apply glitter polish or loose glitter.
- Seal all nails with a glossy top coat.
Tip: Use a matching glitter color to complement your base polish.
7. Red and White Stripes
Add a playful Valentine’s touch with candy cane-inspired stripes.
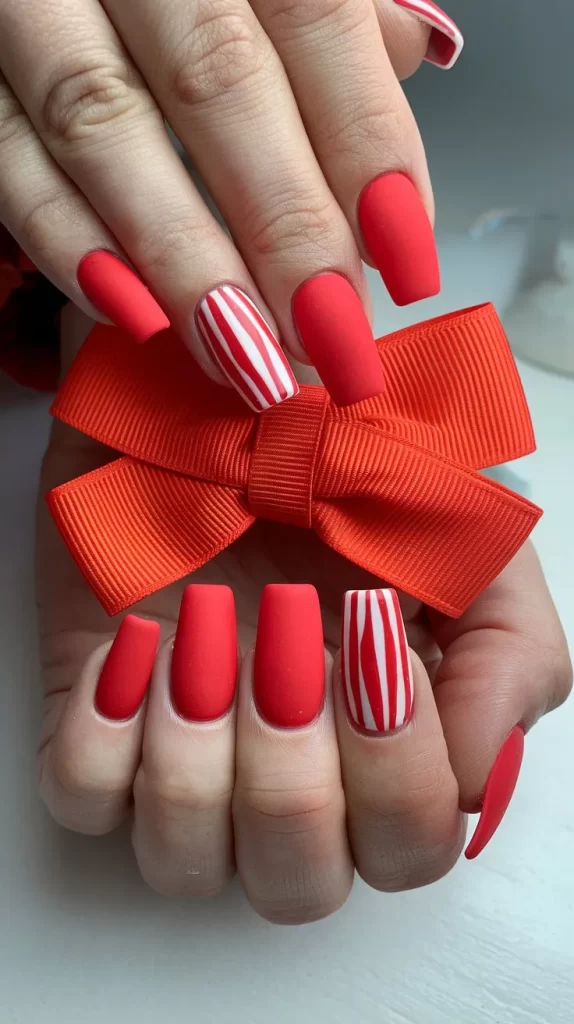
Steps:
- Apply a white base coat.
- Use a thin brush to paint diagonal red stripes on each nail.
- Seal with a glossy top coat.
Tip: Use nail tape for perfectly straight stripes.
8. Chrome Coffin Nails
A reflective chrome finish in red or pink makes a bold statement.

Steps:
- Apply a black or dark base coat.
- Rub chrome powder onto the nails using an applicator.
- Seal with a gel top coat and cure under a UV lamp.
Tip: Keep the chrome powder away from your cuticles for a clean finish.
9. Heart Cutouts
Add a modern twist with negative space heart cutouts.
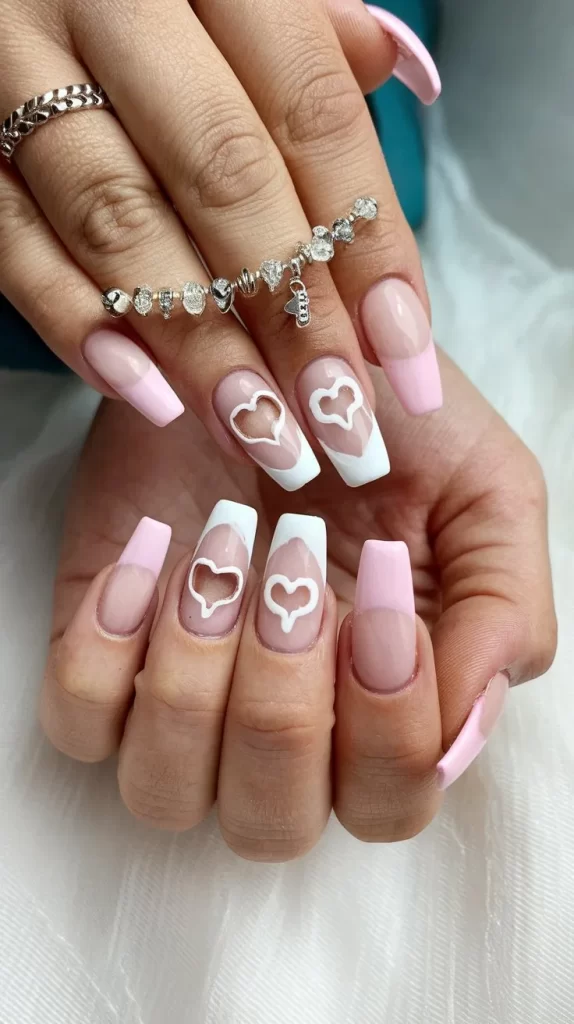
Steps:
- Apply a nude or clear base coat.
- Use heart-shaped stickers or stencils to mask areas before applying red or pink polish.
- Remove the stickers to reveal negative space hearts.
- Seal with a top coat.
Tip: Use tweezers for precise placement of stickers.
10. Red Roses on Nude Base
Hand-painted red roses create a romantic and feminine design.
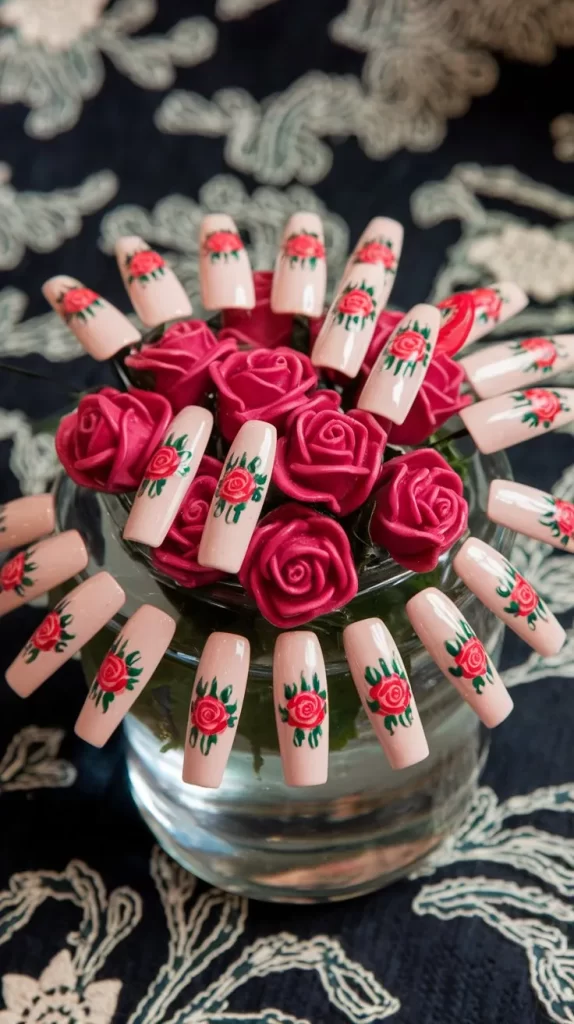
Steps:
- Paint your nails with a nude base coat.
- Use a fine brush to draw red roses and green leaves.
- Add subtle highlights with white polish.
- Seal with a glossy top coat.
Tip: Use a stamping tool for uniform rose patterns if freehand is challenging.
11. Glittered Heart Tips
Combine French tips with heart-shaped glitter designs.
Steps:
- Apply a nude or pale pink base coat.
- Use glitter polish to create heart shapes at the tips of your nails.
- Seal with a glossy top coat.
Tip: Use a thin brush to define heart shapes precisely.
12. Velvet Matte Red Nails
A velvety matte finish adds sophistication to your Valentine’s Day nails.
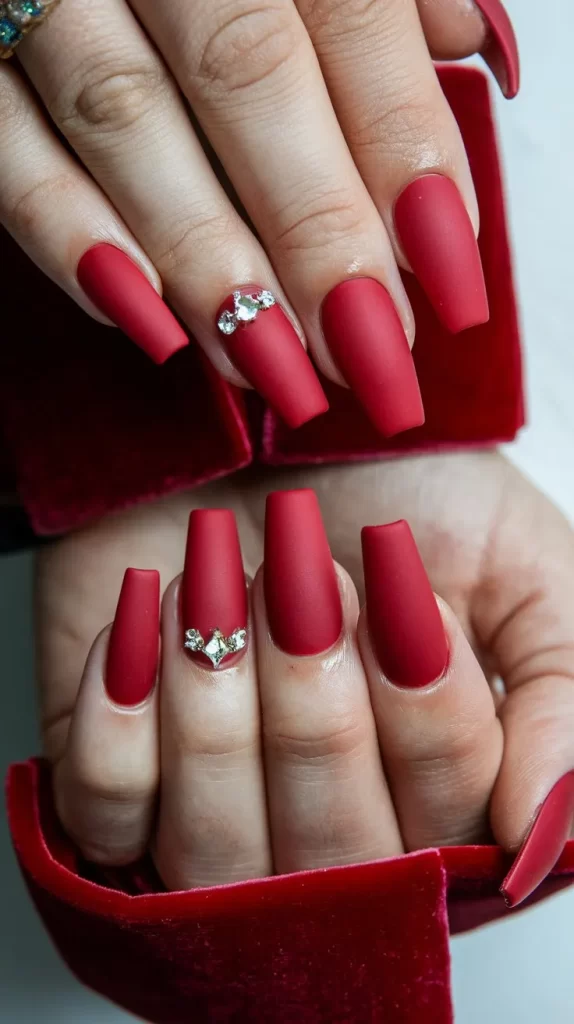
Steps:
- Paint your nails with a deep red matte polish.
- Add a matte top coat for an even velvety texture.
- Optional: Add rhinestone accents for extra glamour.
Tip: Buff your nails lightly before applying matte polish for a smooth finish.
13. Love Letter Design
Bring romance to life with designs inspired by handwritten love letters.
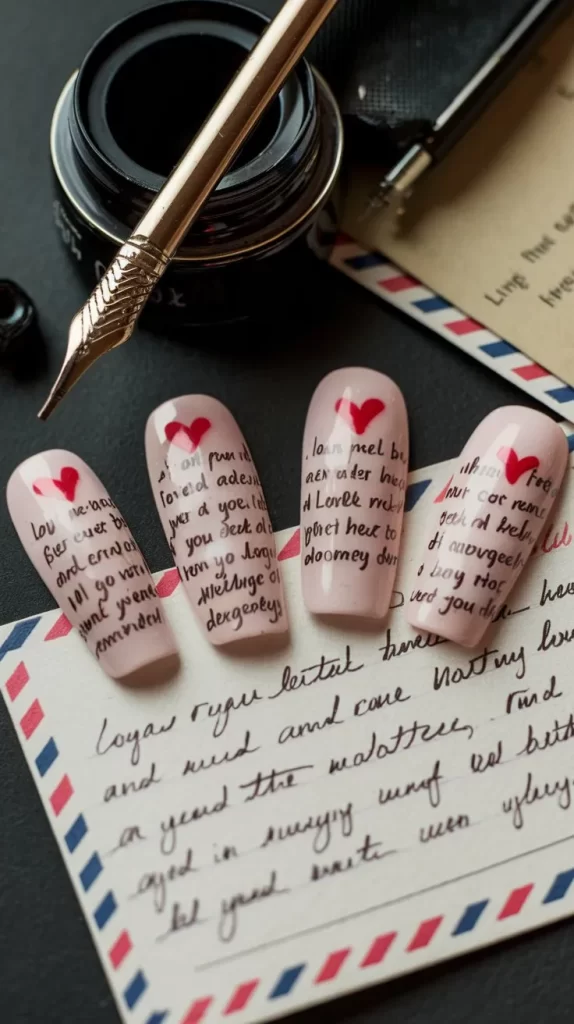
Steps:
- Paint your nails with a soft pink or white base coat.
- Use a thin brush to draw tiny envelopes, hearts, and cursive lettering.
- Add metallic accents for extra charm.
- Seal with a glossy top coat.
Tip: Practice lettering on paper before applying to nails.