Winter celebrations and the holiday season are the perfect time to shine—literally. Sparkly black nails give your look a mix of sleek sophistication and festive sparkle. They pair beautifully with winter coats, holiday dresses, and cozy seasonal settings.
In this post, you’ll find 15 unique ideas for sparkly black Christmas nails.
Table of Contents
- 1. Midnight Snowfall Black Glitter
- 2. Black Base with Holly Green Accents
- 3. Black Ombre with Silver Snowflake Stickers
- 4. Matte Black with Gold Glitter Tip
- 5. Black Base with Red Glitter Accent Nail
- 6. Black with Iridescent Glitter Flakes
- 7. Jet Black and Champagne Sparkle Half-Moon
- 8. Black with White and Silver Candy Cane Stripes
- 9. Sparkly Black with Crystal Rhinestones
- 10. Galaxy Black with Holographic Stars
- 11. Black Base with Green Glitter Swirl
- 12. Black Chrome Nails with Silver Micro-Glitter Gradient
- 13. Black with Candy Red Sparkle and Matte Finish
- 14. Black Base with White Glitter Snow-Tips
- 15. Sparkly Black with Champagne Pearl Accent Stripe
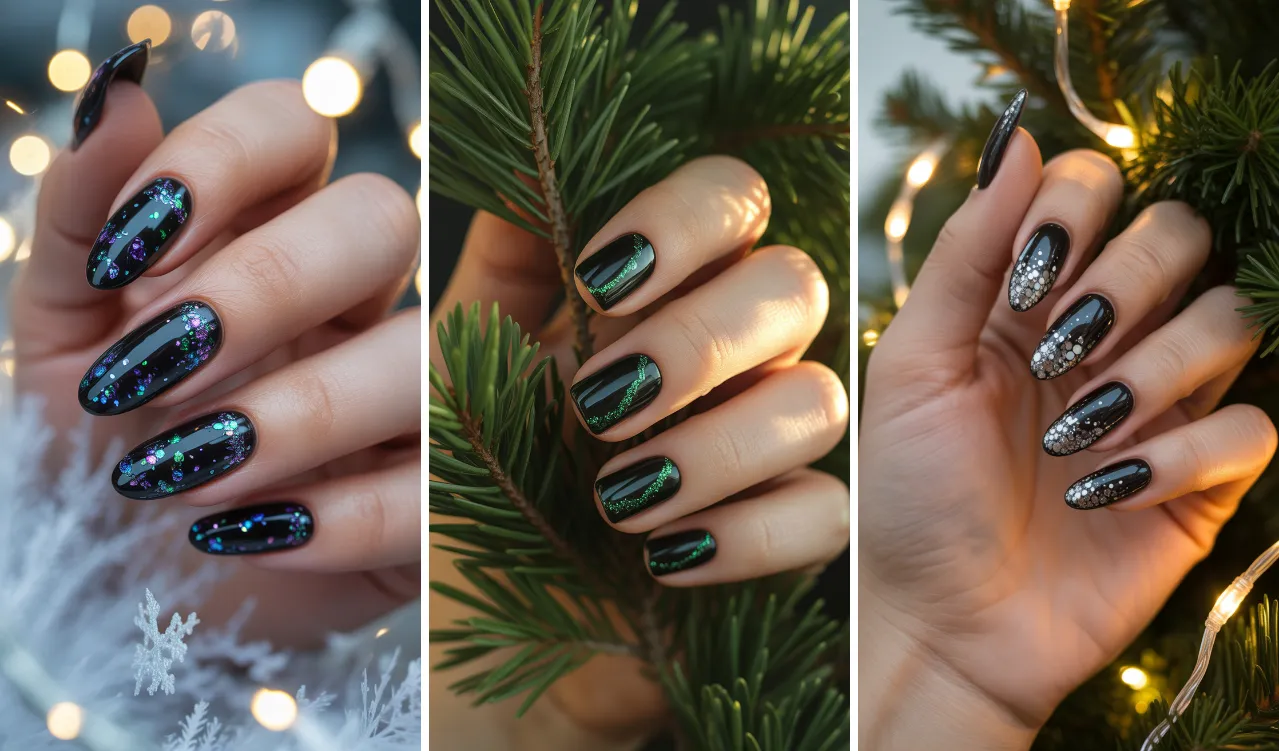
1. Midnight Snowfall Black Glitter
Imagine nails painted a deep, glossy black—like the night sky—then topped with fine silver and white glitter to mimic falling snow. The base black gives a dramatic look, while the glitter adds a shimmering contrast, making the nails feel festive yet elegant. This style works well for winter celebrations because the sparkle evokes snow under moonlight, and the black keeps it chic and wearable beyond the holidays.
In practice, you might apply a gel or polish in a true black tone, then dab on small bits of silver micro-glitter near the cuticle and let it fade out toward the tip (a gradient effect). Finish with a glossy top coat to lock in the sparkle and give a mirror-like shine. The result is eye-catching but still refined—perfect for a holiday dinner, party, or casual winter outing.
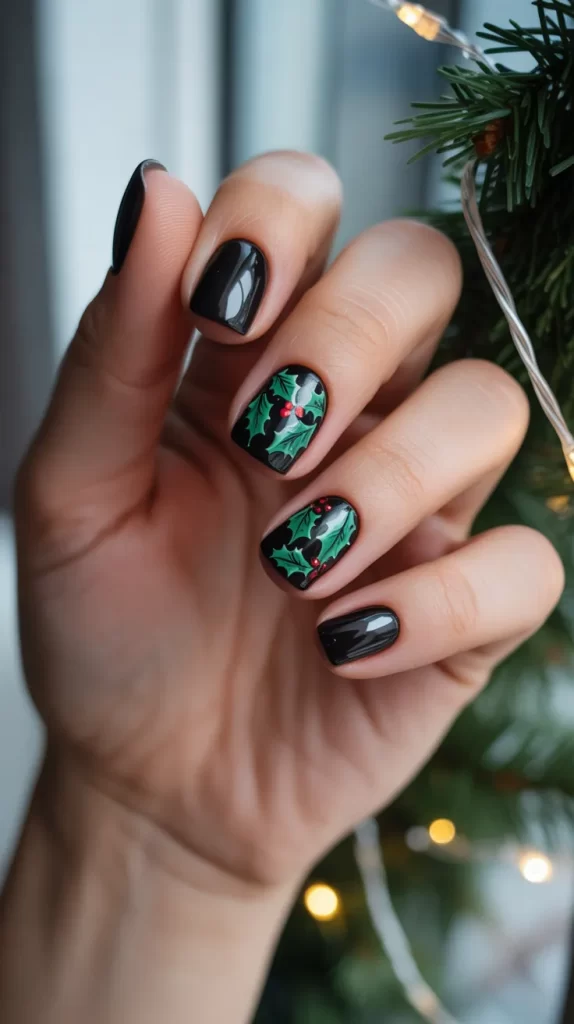
2. Black Base with Holly Green Accents
This idea uses a sleek black base as your main canvas, and then adds small holly-leaf accents in a vibrant green with tiny red dots for berries. It’s festive, playful, and still classy. The contrast between the black and the green/ red accents makes the holiday motif clear without being over the top. It’s great if you want nails that reflect Christmas motifs but can still look polished in other settings.
To create this look, paint nails in a rich black shade. Then with a thin brush, paint small holly leaves on one or two accent nails (for example, ring finger and thumb). Use green polish for the leaves and red tiny dots for the berries. Finish with a glossy top coat. The result is a fun holiday design, while the predominant black keeps the look elegant and versatile.
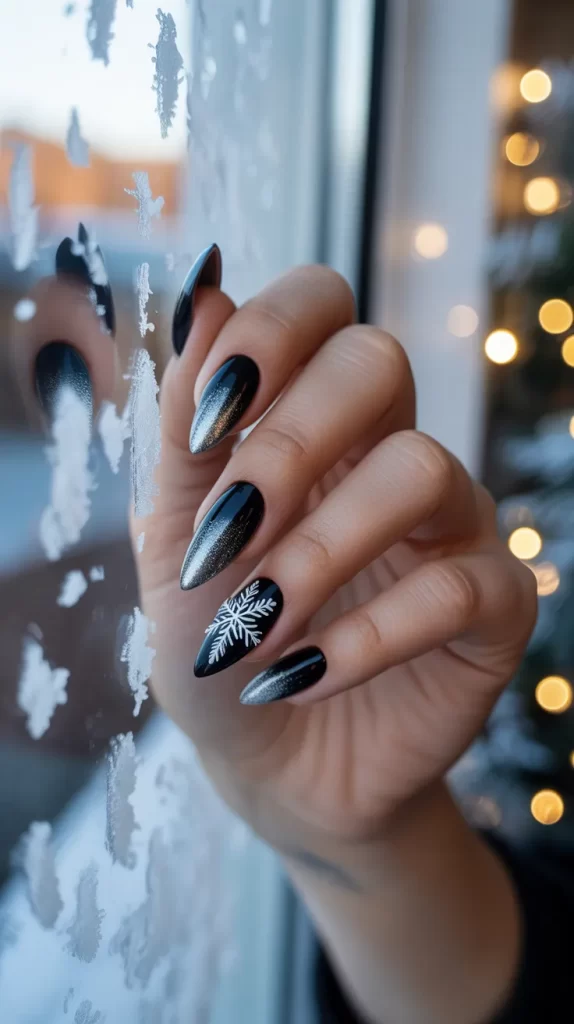
3. Black Ombre with Silver Snowflake Stickers
This look starts with black at the nail root and gradually fades into a silvery grey or metallic silver at the tips—an ombre effect that echoes the glint of ice or frost. On top of that, tiny white or silver snowflake stickers or decals are placed on one or more nails. The combination of black, silver and snowflake motifs brings together elegance and winter wonder in one design.
In practice, you’d apply the black color, then use a sponge or airbrush to fade into silver or grey. After curing (if gel), apply snowflake decals or hand-paint them in a crisp white or metallic silver. Seal with a high-gloss top coat. This design feels winter-themed but also sophisticated enough for formal events or holiday dinners.
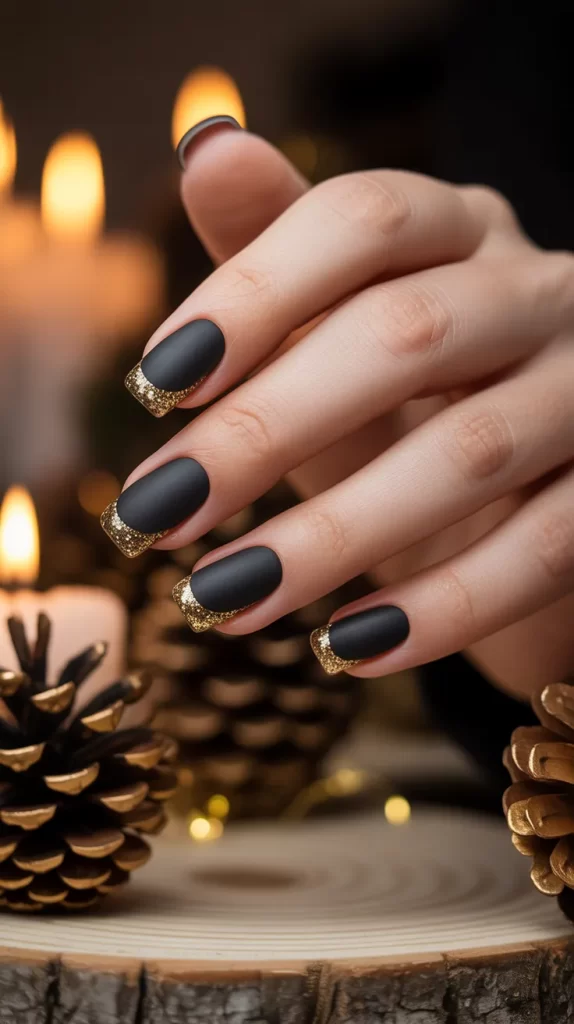
4. Matte Black with Gold Glitter Tip
Swap the usual glossy finish for a matte black base—it gives a modern and edgy feel. Then highlight the nail tips with a fine gold glitter line (a reversed French tip) or a thin chevron of gold sparkle. The matte black offers contrast and texture, while the gold glitter feels festive and luxurious. This style works well if you like minimalist designs but still want holiday sparkle.
To do this, apply a matte-top coat over a black nail polish or gel. Then use a fine brush or glitter polish to apply gold glitter just at the tips. You can vary the width of the tip line depending on how bold you want it. Finish with a matte or semi-matte top coat (depending on how much sheen you like). The end result: matte black nails with just a dash of golden glamour—a perfect mix for winter celebrations.
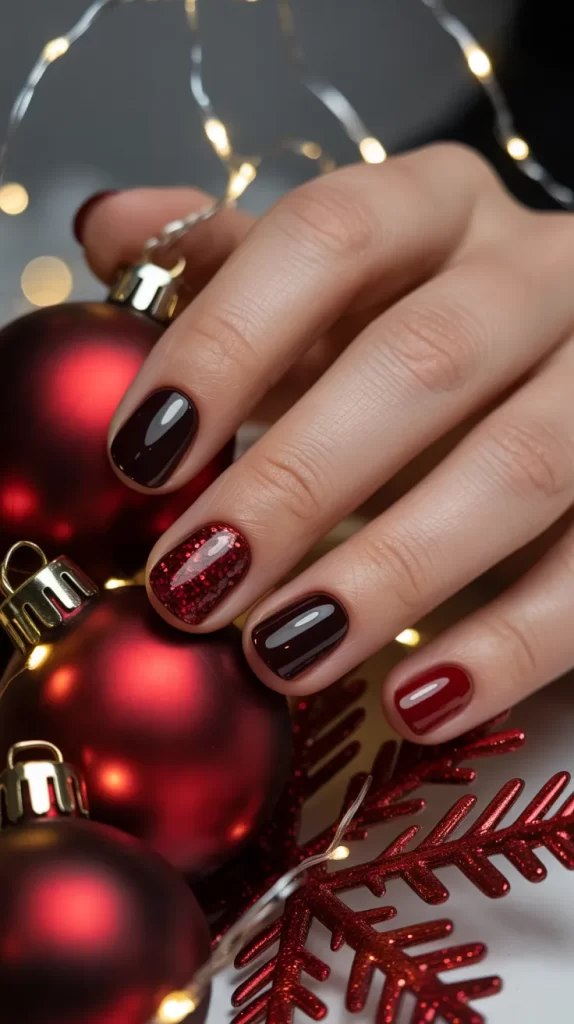
5. Black Base with Red Glitter Accent Nail
Here you keep most nails painted glossy black, but choose one accent nail—often the ring finger—to apply red glitter polish entirely. The red glitter pops and gives a nod to classic Christmas colors (black + red = dramatic holiday chic). It’s a great option if you don’t want heavy nail art but still want one bold eye-catching detail.
In practical steps: paint all nails in glossy black. Then pick the accent nail and apply a rich red glitter polish (or layer red glitter over red base). Let it dry/cure and apply the top coat for a smooth finish. The red accent draws attention and gives holiday energy, while the black nails provide balance and sophistication. This approach is easy to execute but gives a stylish impact.
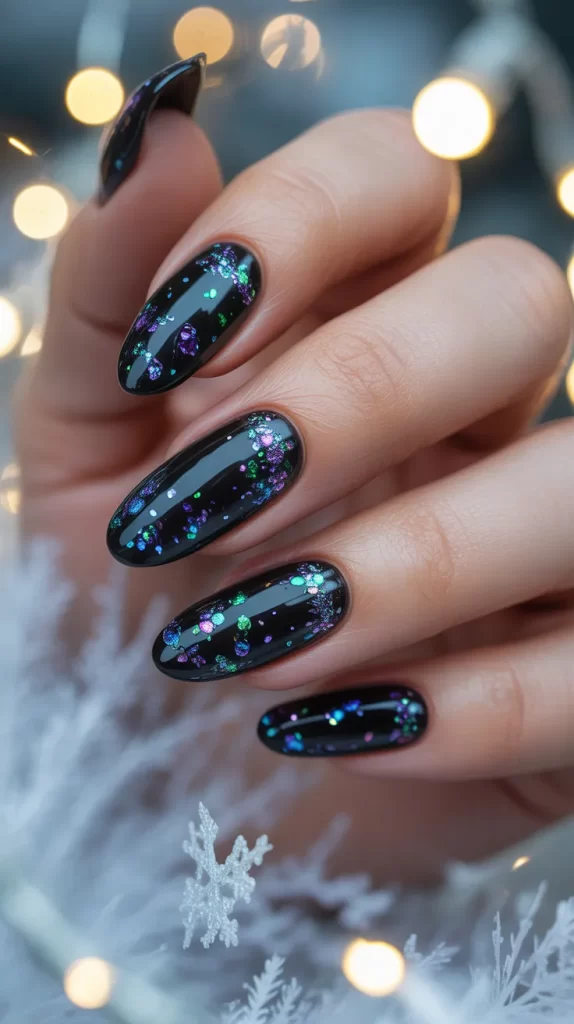
6. Black with Iridescent Glitter Flakes
This design uses a black base polished to a high shine and then adds chunks or flakes of iridescent glitter that shift between colors (blue, purple, green) when they catch light. The effect is like seeing twinkling stars or shimmering ice on a dark winter night. It brings magic and movement to the nails while sticking to black as the main theme.
How to achieve it: paint nails in black. Then apply a clear top coat mixed with iridescent glitter flakes (or apply flakes directly to tacky gel surface) and seal with one or two layers of top coat. The flakes should be slightly spread so you get sparkle but not full coverage, letting the black show through. The result: nails that are dark and bold, but with a show-stopping glow under lights—ideal for holiday parties.
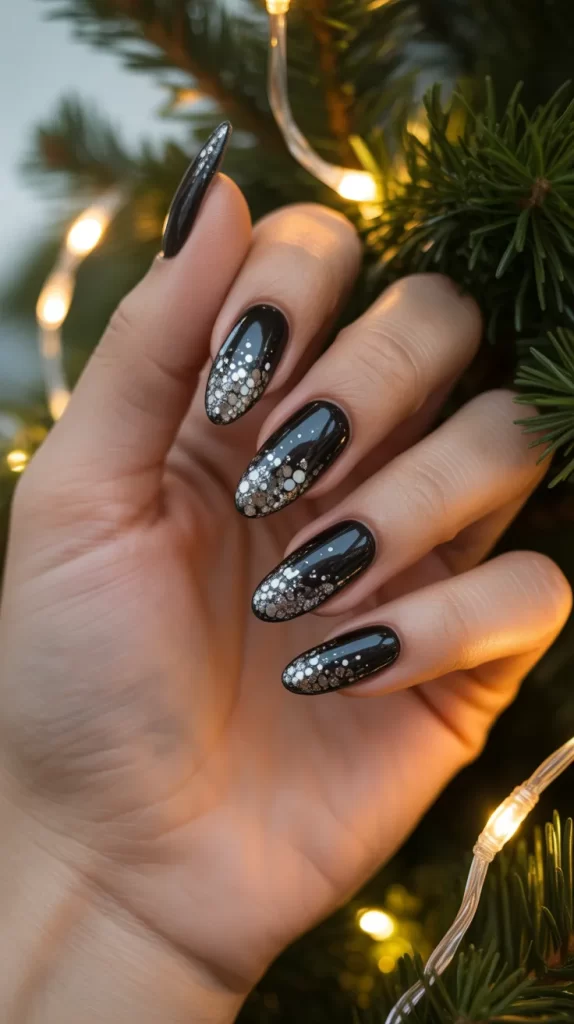
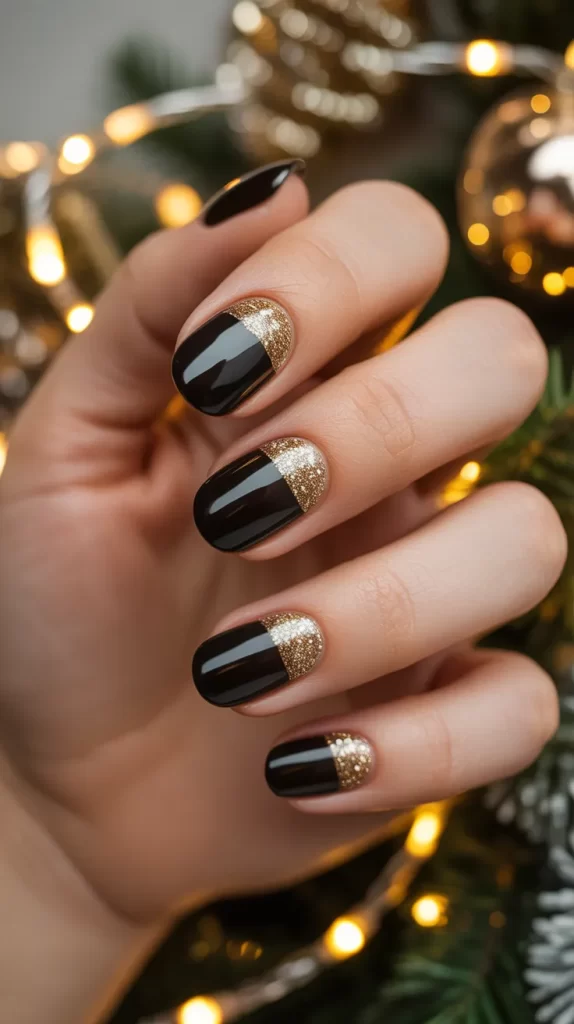
7. Jet Black and Champagne Sparkle Half-Moon
The half-moon nail design gets a festive twist here: use jet black for most of the nail, and then apply champagne-colored fine glitter (soft gold) in the half-moon area near the cuticle. The champagne glitter adds warmth and sparkle, and the half-moon gives a vintage yet modern feel. This style can pair beautifully with metallic holiday accessories.
In practice: apply black polish, then on each nail apply a small semi-circle of champagne glitter at the base (near the cuticle). You can use stickers or guides for clean half-moons. After the glitter is applied, seal with a glossy top coat. This creates a harmonious two-tone effect—the dark black offers depth, while the champagne glitter lifts the look into celebration mode without being too bold.
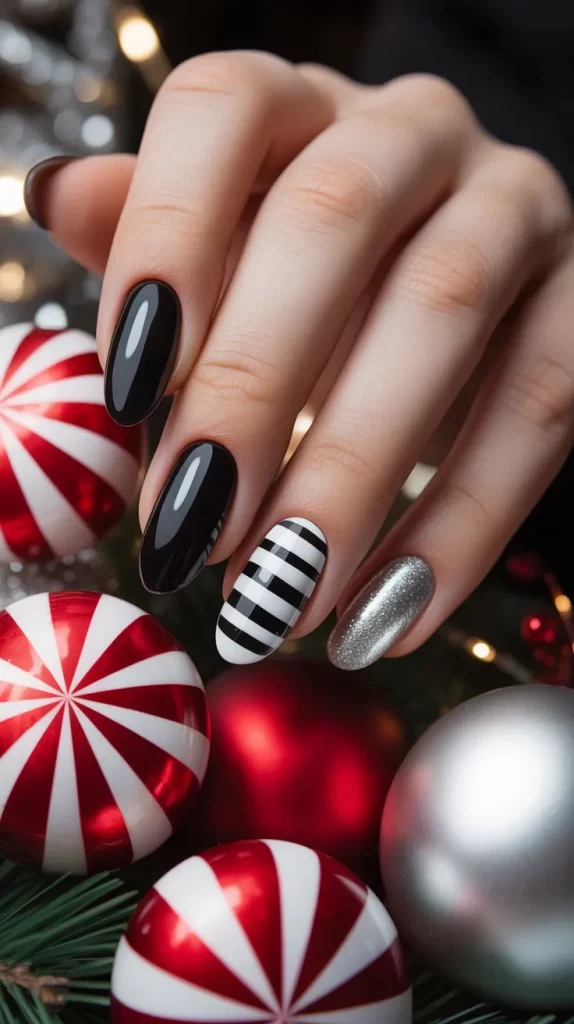
8. Black with White and Silver Candy Cane Stripes
For a more fun and playful take, use a black base and then add thin white and silver stripes on one or two nails to mimic candy-cane lines—but with a modern twist. Instead of red and white, you have black, white, and silver. The black givesa strong contrast, while the stripes bring in the holiday cheer. This style is great if you like festive motifs but prefer a more muted palette.
How to create it: paint nails black. On one accent nail (or more, depending on your preference), use a thin nail art brush or striping tape to apply diagonal stripes in white and silver. You can alternate white and silver lines. Finish with a glossy top coat for shine. The effect is bold, graphic, and fun—with enough sparkle to feel party-ready, yet chic thanks to the black base.
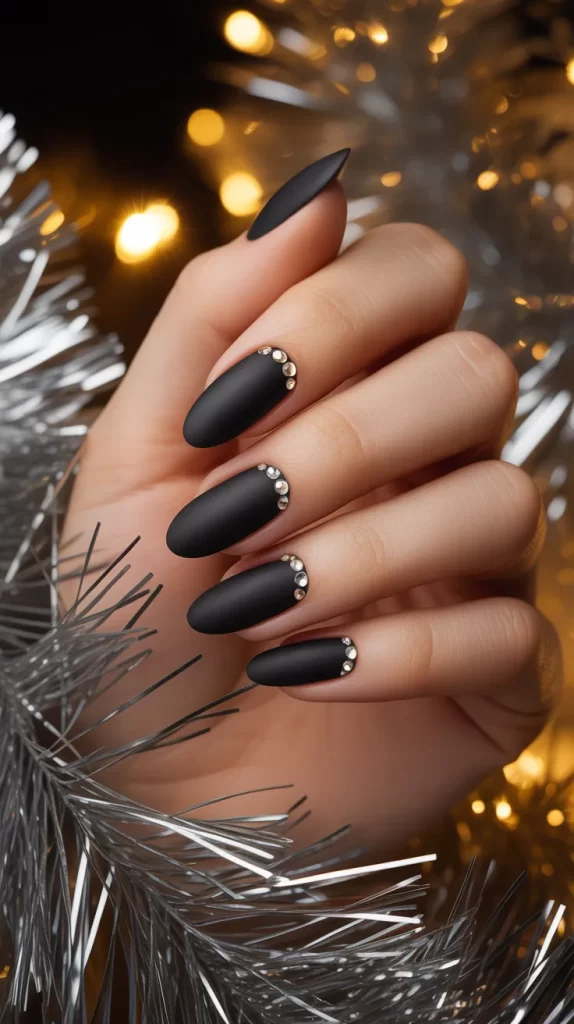
9. Sparkly Black with Crystal Rhinestones
Here’s a glam look: start with a glossy or slightly shimmered black base, then place small clear or silver crystal rhinestones near the cuticle or along one side of each nail. The rhinestones catch light and add luxe sparkle. It’s perfect for a night out during the winter holidays, where you want your nails to sparkle like jewelry.
To do this: paint nails black. Then, while the polish is still tacky or using nail glue (if gel), place rhinestones in a line or cluster near the base or on one side of the nail. Use a top coat to encapsulate and keep them secure. The result: nails that reflect light, sparkle in movement, and feel dressed up for festive occasions—but with black as the main, grounding colour.
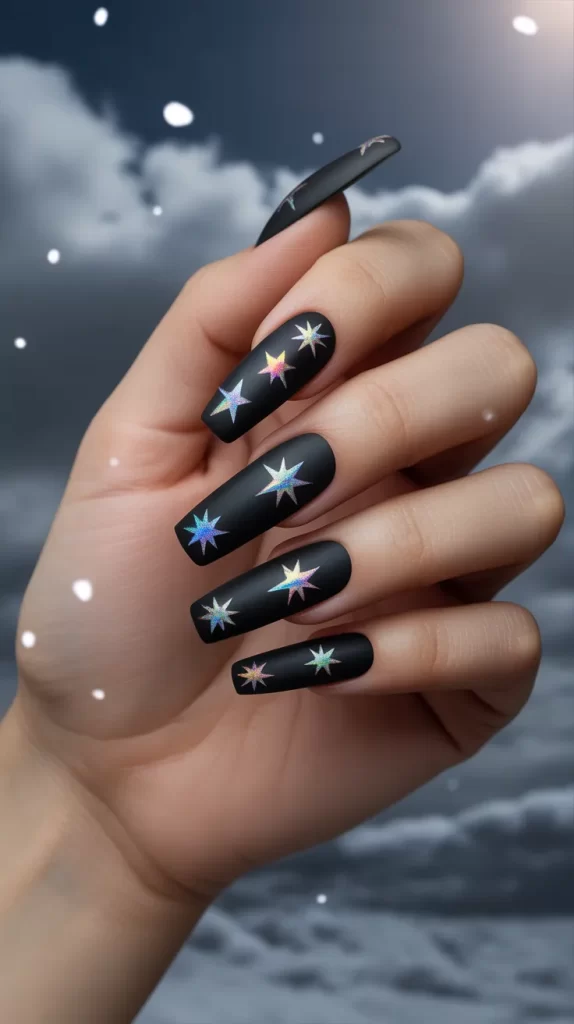
10. Galaxy Black with Holographic Stars
Capture the cosmos in your manicure with a design that resembles a starry galaxy night. Use a black base with tiny holographic star decals or very fine holographic glitter sprinkled on top. The holographic bits will reflect different colours depending on the light, giving dynamic sparkle. It’s a whimsical yet chic design for holiday or winter nights.
In practice: apply a black polish or gel. Add a very fine layer of holographic glitter or apply star-shaped holographic nail decals randomly. You might add a tiny gradient of navy or deep purple in one corner of the nails for extra dimension. Finish with a top coat. The effect: nails that look like a winter night sky filled with multicolored stars—perfect for the season and extra special events.
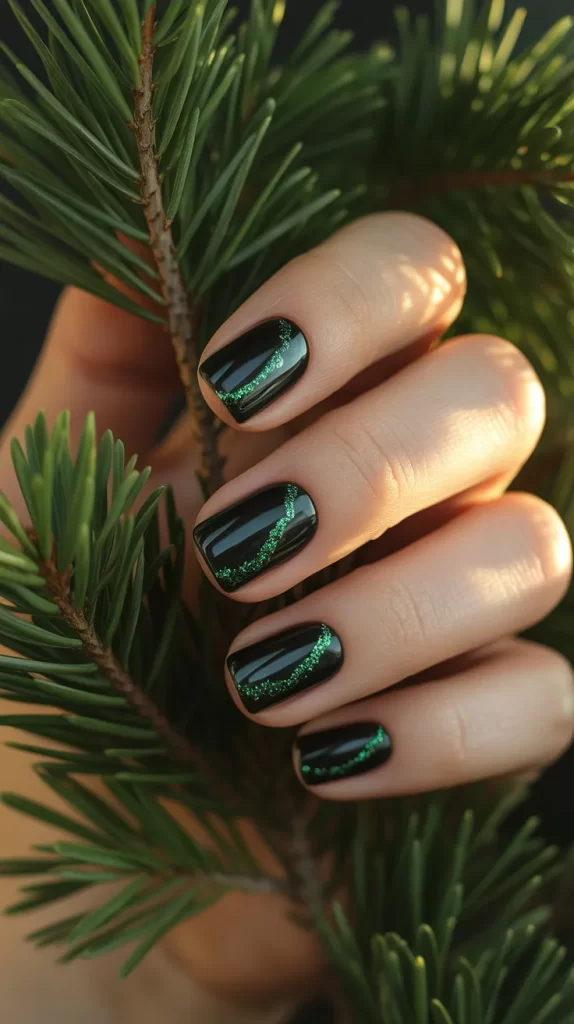
11. Black Base with Green Glitter Swirl
This design uses black as your base and then adds a swirl or wave of emerald-green glitter along one side of each nail (or on an accent nail). The green glitter brings a fresh holiday feel (think evergreen branches), and the swirl brings movement and style. It’s a little more artistic than straight lines, making it perfect for someone who likes creative nail art but wants to keep it classy.
To create: paint nails black. Use a fine brush or a glitter gel to draw a gentle curve or wave of green glitter along one side of each nail (or just a few accent nails). Seal with a top coat. The green glitter, in contrast to black, offers a festive nod without being heavy. It works for both holiday parties and everyday winter wear due to its smart design.
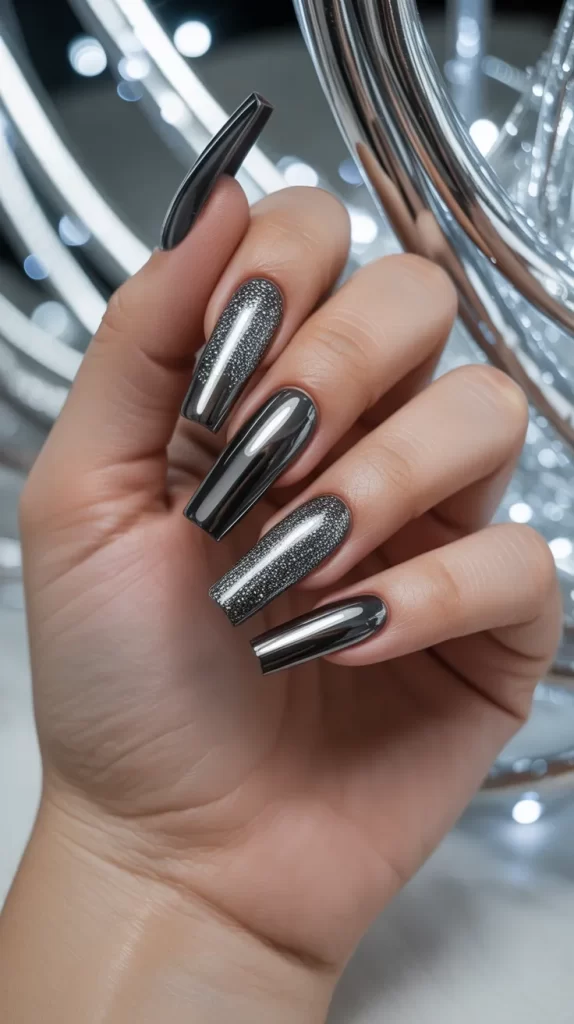
12. Black Chrome Nails with Silver Micro-Glitter Gradient
This idea goes ultra-sleek: use a black chrome or mirror-black polish (ultra-shine) and then apply a micro-glitter gradient of silver from the base upward (or vice versa). The chrome finish makes the nails look like polished jet, and the gradient glitter adds shimmer and depth. It’s a modern, high-fashion look with holiday sparkle built in.
In practice: apply a black chrome or mirror black polish. While it’s still tacky (or using a slightly damp sponge), dab silver micro-glitter or very fine glitter pigment starting at the cuticle and fading upward. Then seal with a glossy top coat. The combination of mirror-black and silver sparkle makes this design stand out, perfect for an elegant celebration or glamorous holiday event.
13. Black with Candy Red Sparkle and Matte Finish
Here, you mix finishes in an interesting way: nails painted in a deep black but finished with matte top coat, and then one or two accent nails or tips coated in candy-red sparkle. The matte base keeps things subtle and modern, while the candy-red sparkle adds a punch of holiday color. It’s a fun way to blend black and red for Christmas while using texture (matte vs sparkle) to create interest.
How to do it: apply black polish and then a matte top coat. Choose one or two nails: apply red glitter polish fully or for the tips. For the red sparkle, you might use a glossy finish to contrast with the matte base. Finish with a top coat on accent nails if required. The end result is stylish and festive, perfect for those who like edgier nail art with holiday vibes.

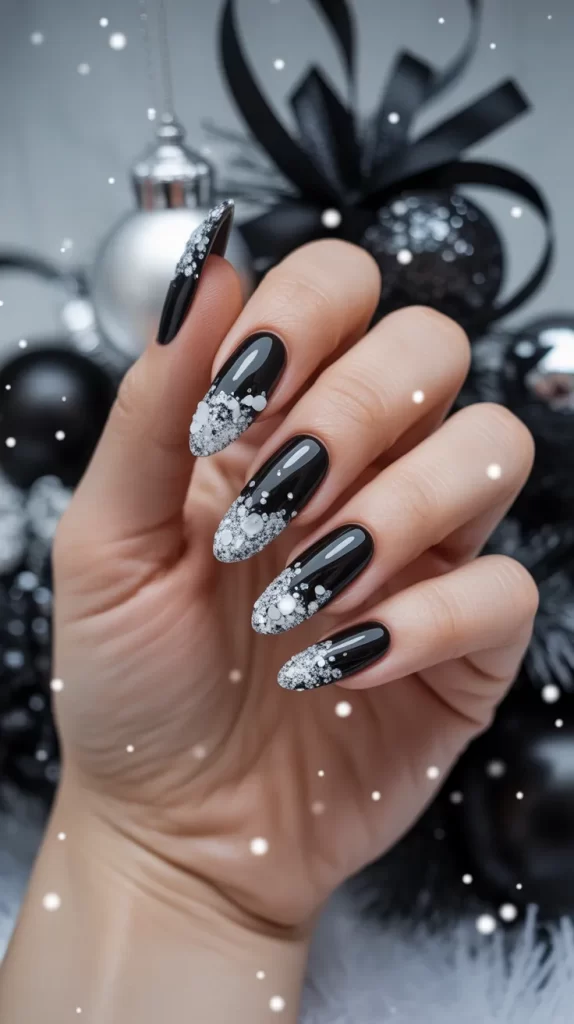
14. Black Base with White Glitter Snow-Tips
This design gives a holiday twist on the classic French tip. Use a black base, and then instead of a white tip you use white fine glitter or chunky white sparkle to create the ‘snow-tip’ look. It’s like the tips of the nails are dusted with fresh snow on a dark branch. It’s elegant, festive, and perfect for winter occasions.
To create: apply black polish. After it dries, apply white fine glitter or snow-flake-like white sparkle just on the tips of the nails (you could also use chunkier pieces for texture). Seal with a glossy top coat. The black base grounds the look, and the white glitter tips make a striking, crisp contrast—giving you winter-themed nails without going overboard.
15. Sparkly Black with Champagne Pearl Accent Stripe
The final idea combines glamour and subtlety: nails painted sparkly black (black polish with very fine black or silver shimmer) and then one thin stripe down the centre of each nail (or on accent nails) in a champagne-pearl colour. The champagne-pearl stripe gives soft brightness and pairs beautifully with the dark shimmer base. It’s festive, refined, and works well for formal holiday evenings.
In practice: choose a black polish with micro-glitter shimmer. Paint all nails. Once dry, use a thin nail art brush (or striping tape) to add a vertical stripe in a champagne-pearl polish. Seal with top coat. The shimmer in the black base catches light, and the champagne stripe adds a classy highlight. This look balances boldness and elegance—ideal for winter celebrations where you want to shine.
